
Create Your DIY Tabletop Chalkboard & Add Charm to Your Work Space!
Articles may contain affiliate links.
How Do You Remember?
When most people need to remember a little piece of information, they immediately grab their smartphones and jot it down. Me though… my brain just doesn’t work that way. More often than not, I take a note in my phone and completely forget about it. And that kinda defeats the whole purpose, doesn’t it? Having a bullet journal solves this most of the time, but sometimes you need an in-your-face reminder to make sure you don’t forget to buy AA batteries again…. but I digress. That’s where my DIY Tabletop Chalkboard comes in handy!

I’m so happy with how my DIY tabletop chalkboard turned out! It’s just too cute. I’m now officially obsessed with tiny easels. Of course you could go buy a whiteboard to put next to your desk or hang on the wall, but where is the fun in that? You can just as easily, and for a lot less money, create this charming desk accessory and show everyone how much of a creative rockstar you are!

In this tutorial, I’ll walk you through the simple steps of creating your own DIY tabletop chalkboard. It may look hard at first, but it really is simple, and you can use it just about anywhere. Now, before we get started you will need to grab some supplies – but don’t worry! It is all pretty basic stuff.
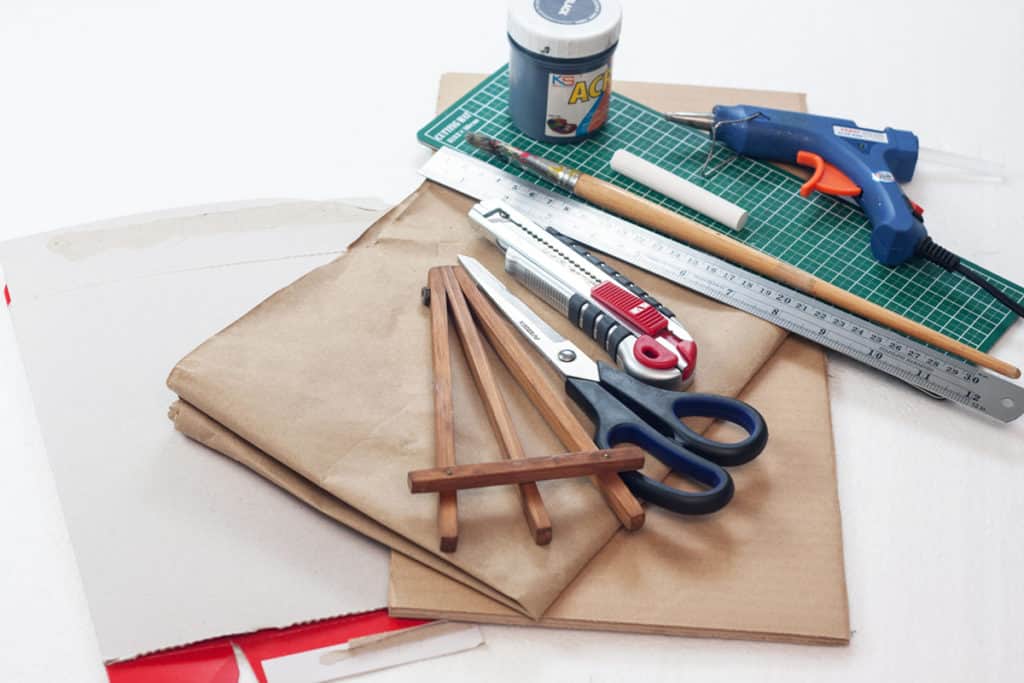
Materials:
Here is what you’ll need:
- empty cereal box
- small piece of brown layered cardboard
- cutting mat
- small easel
- pair of scissor
- black acrylic paint, or chalkboard paint
- paint brush
- X-acto knife or box cutter
- ruler
- hot glue gun
- Chalk (Fun color pack is optional, but so much better)
Let’s Get Started
There are really only 10 steps to creating your DIY tabletop chalkboard. Remember as you work through these steps that you can make this chalkboard as big or as small as you want to fit your needs. Now let’s get to work!

Step 1: Cut a rectangular piece out of your cereal box. Remember, you are going to have to cut the box to a size that fits your easel, the smaller the easel, the smaller a piece you cut.
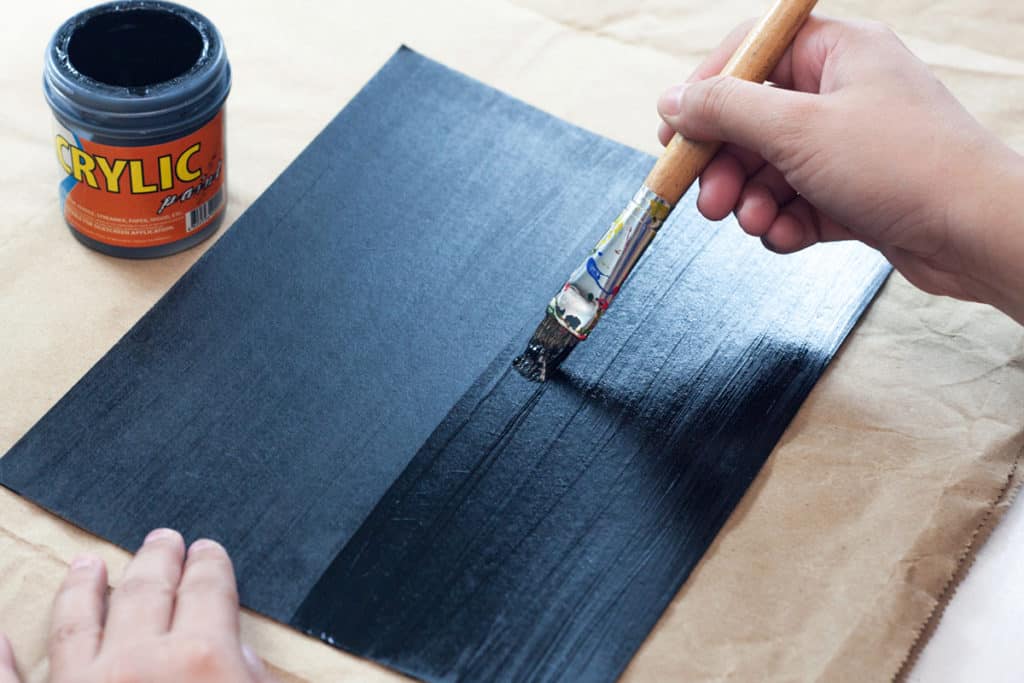
Step 2: Paint the inner part of the box rectangle using your black paint. Make sure that you do as smooth and even a coat as possible, and paint in the same direction.

Step 3: Make sure to put down two or three coats to get ample coverage.

Step 4: Let the paint dry for an hour or two. I love watching paint dry. It’s a hobby of mine.
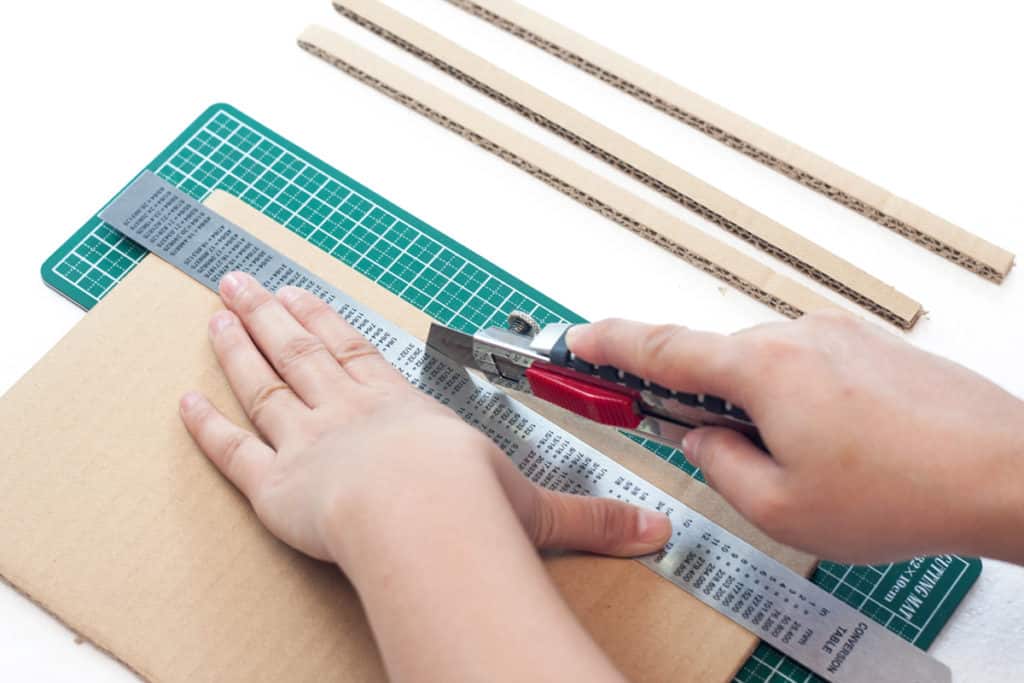
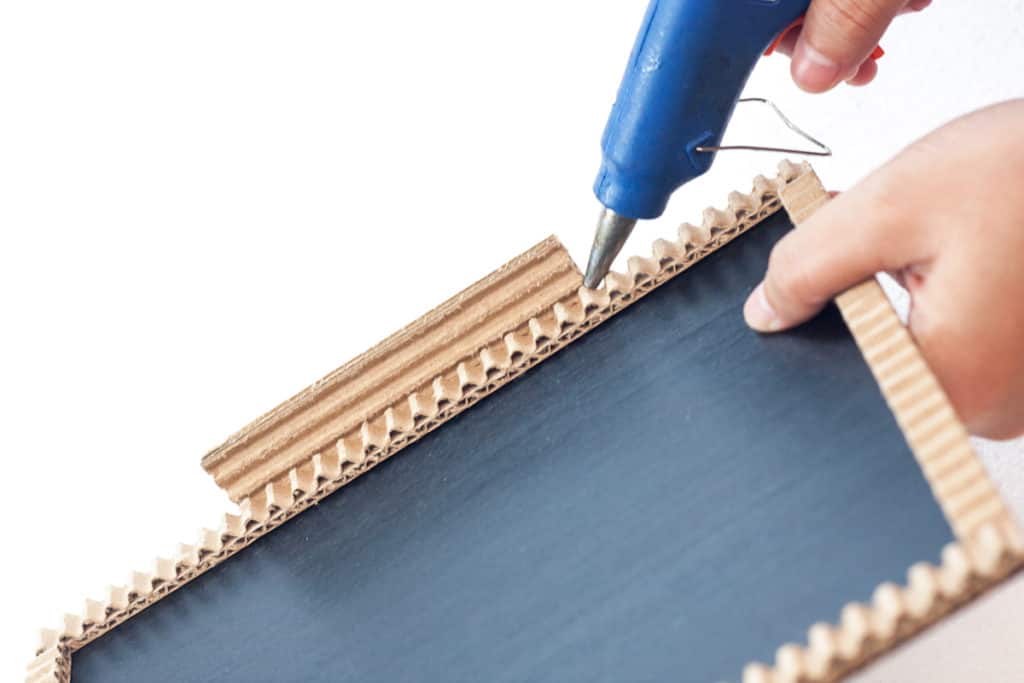
Step 5: Cut 4 one-centimeter strips from the cardboard. Note: you can make these strips bigger if you are using a bigger easel, and want a thicker boarder.

Step 6: Peel off one side of the strip to expose the corrugated layer. Do the same for the 3 other strips, as these will be your boarder.
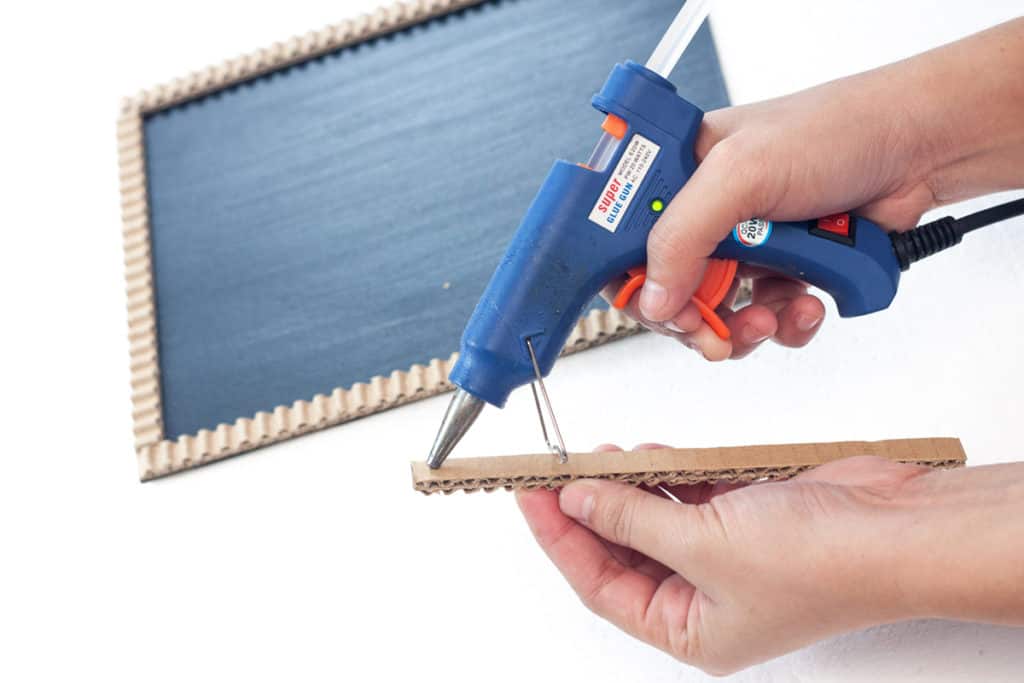 Step 7: Glue the four corrugated strips to the edge of your chalkboard.

Step 8: Cut a small rectangle that is at least 8 centimeter long and 2 centimeters wide from the remaining cardboard. Once again, you can cut a bigger piece if you are using a bigger easel. I wouldn’t recommend any smaller though or it may not hold your chalk!

Step 9: Peel off one side of the strip to expose the corrugated layer. Clean it off and make sure to remove any tiny bits of paper that is in between the spaces.
Step 10: Now just glue it to the bottom of the chalkboard.
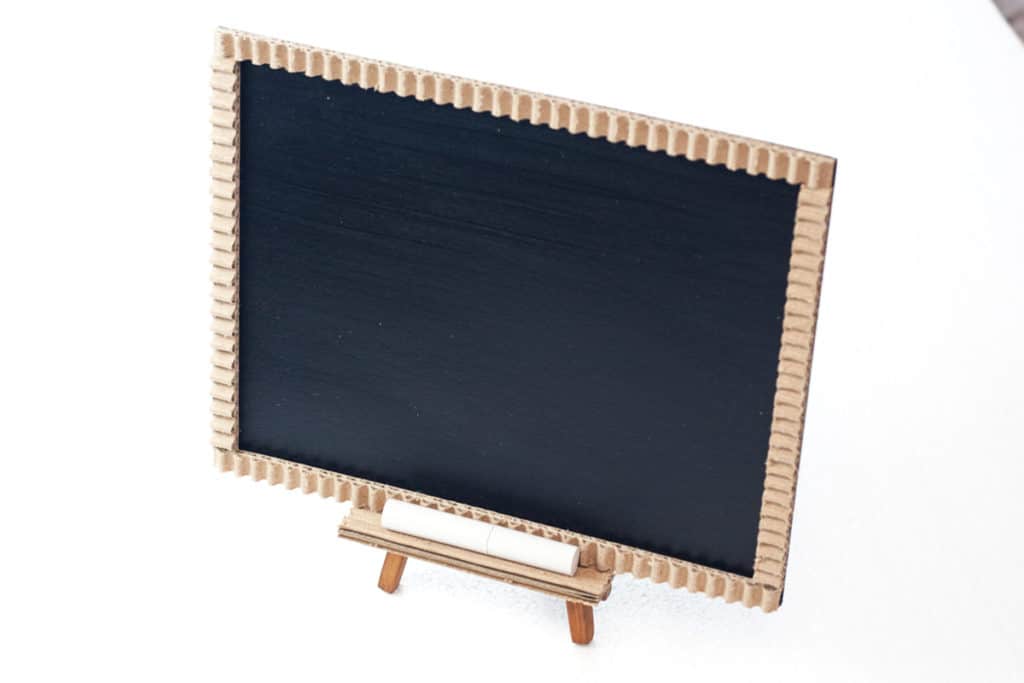
There you have it! Stick it on your easel and you have your very own DIY tabletop chalkboard! Easy, right?

Super Simple, Super Fun!
Put it on your desk and start jotting down notes. This is the perfect time to bust out those fun chalk colors and get creative! To erase, you can use a simple chalkboard eraser, or just a tissue. This little chalkboard project creates a great piece to add a little bit of personality to your work space. Plus what’s better than being able to say “yeah, I made that”?
*This post contains affiliate links. That means that if you click on a link and buy something, I may get a portion of the sale at no cost to you. I have affiliate links so I can promote products and services that I think are excellent. It also helps me make a living off of this site so I can keep creating content for you. Thank you for helping me live my dream!*


I love this idea! If you like little easels, then you should check out this link.
http://www.recyclart.org/2015/11/mini-easel-clothespins/
They are peg easels, which can hold business cards, quotes or small prints of art. I’ve made a few and they are absolutely gorgeous! I hope you like them.
Sophie 🙂
Those are just cute as can be! Thanks for sharing, Sophie!