Heat Embossing Techniques – How to Add Golden Flair to Your Journal
Articles may contain affiliate links.
Heat Embossing – What is it?
If you wander Instagram or browse Pinterest, then it’s likely that you’ve seen heat embossing in action. That magical transition from a dark brown powder to a shiny gold or copper image is breathtaking. It looks like a professional method, but the truth is that it’s very simple and inexpensive! You only need a few tools to create this gorgeous effect yourself. So let me let you in on a few easy heat embossing techniques that you can do for cards, artwork, and even your bullet journal!
The Materials
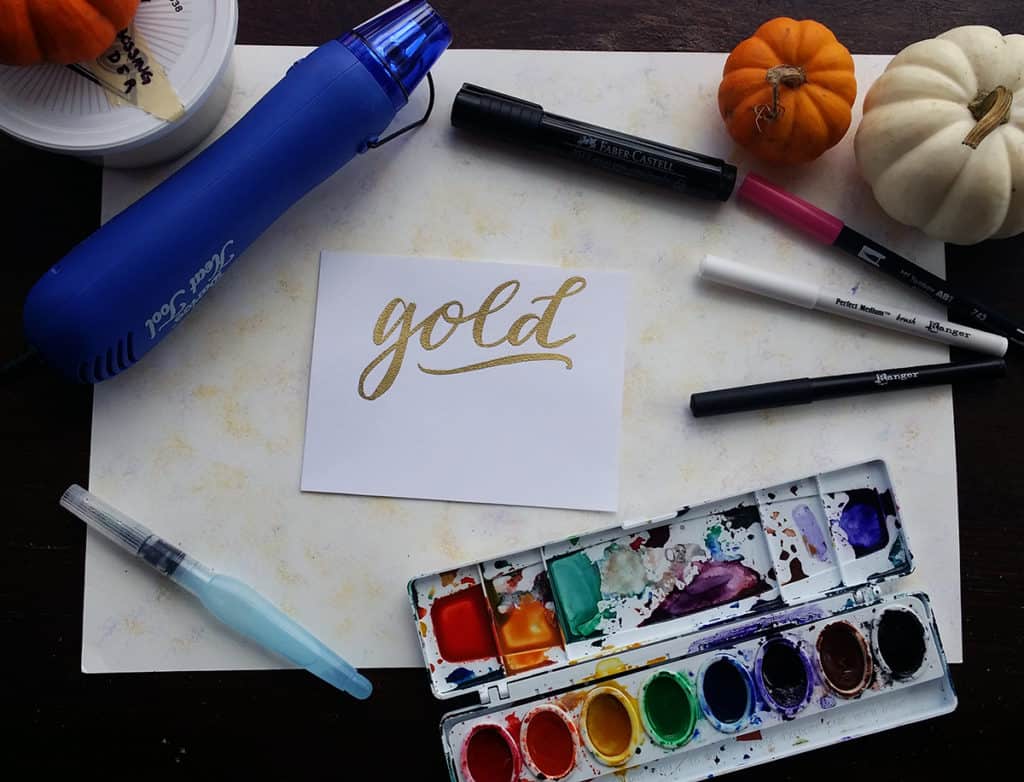
Firstly, you need to get your hands on a few things. You will need embossing powder, embossing pens/ink, and a Darice heat gun. That’s it! Well, you’ll also need a surface to emboss. I’ve been using regular old cardstock, watercolor paper, and my trusty Leuchtturm.
Beyond those necessities, there are a few things you can get that will be helpful during your embossing fun. An embossing powder bag will help keep any tiny pieces of stray powder from sticking to your surface due to pesky static. I want one, but I haven’t ordered it yet! But let me tell you that static is giant pain, so I would highly suggest grabbing this. I currently use a dryer sheet, and it’s not very effective.

If you do get stray powder, a tiny dry paintbrush is great for brushing the extras off your page. Of course, you could stick with gold like I have here, but there are tons of colors out there. I’ve heard great things about Liquid Platinum and I’m dying to try Copper. If you want to use your embossing skills for making cards or gifts for people, consider grabbing some black cardstock to make the metallic really stand out!
The Basic Technique
Once you have the tools, the process is very simple.
- Apply static bag to work surface. Put a scrap piece of paper under your work to catch extra powder.
- Write your message or draw your design using an embossing pen.
- Coat the wet ink with your embossing powder (best to do this twice to ensure coverage).
- Tap or flick off excess powder. Brush off powder with dry paintbrush if necessary.
- Turn on your heat gun. Let it heat up for a moment, then point it at your design at a 45 degree angle, about two inches away.
- Watch in amazement as your powder becomes molten gold!

Extra Embossing Techniques
Now that you know the basics, you can start applying that knowledge and create some awesome designs. I have used embossing powder to create cards, cute decorations to put above my desk, and embellishments in my bullet journal. Let’s go over some cool tips and tricks for getting the most out of your embossing tool!
Create Banners and Headers
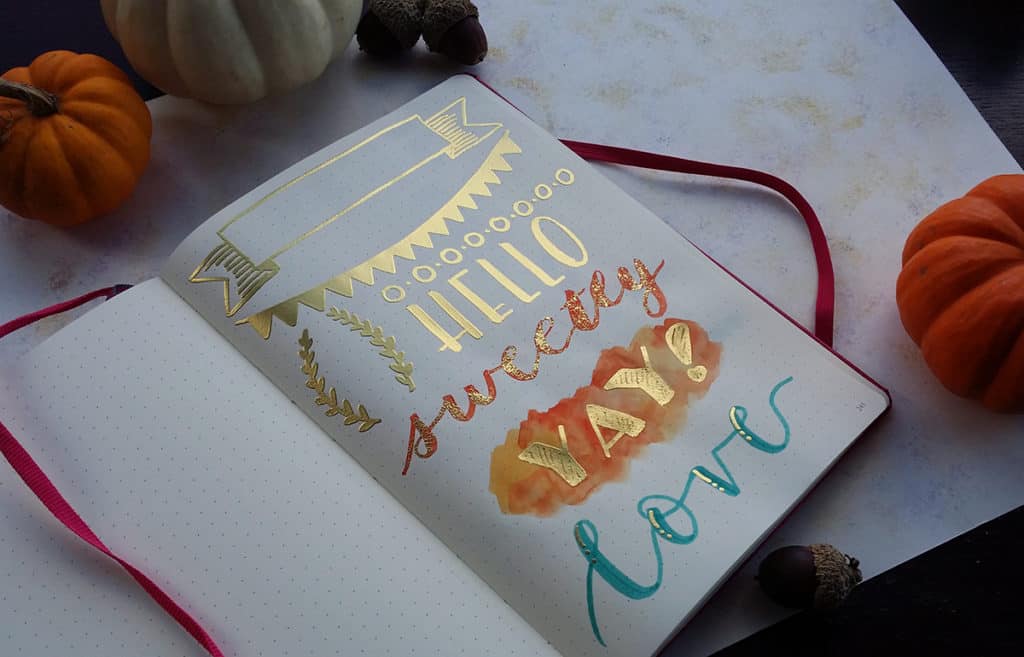
Nothing will stand out on your page more than a glistening gold banner! Draw out a simple design, like the pennant and ribbon banners at the top of the page, and emboss away. You’ll have an eye-catching display that will never cease to amaze.

Decorative Touches and Dividers
Invoke ancient Greek by creating a golden wreath to frame your words. Or simply divide two sections of your page with small dots, lines, circles, or any other basic design. For embossing powder, simple is better. If the design is too intricate, you will lose some of the details when the powder is applied.
Outline
Draw the outline of your word or phrase to add a touch of class and elegance. You can fill it in with watercolors, Tombow Brush Pens, or anything really!

Add Highlights
Give a tiny touch of gold to a brush lettered word or phrase to really make it pop! I used my teal Faber-Castell Pitt Artist Pen on the page in my bullet journal and my Faber-Castell Big Brush below. As you can see, the gold shines beautifully on both colors. Is there a color gold doesn’t pair well with?

A Pinch of Fairy Dust
This is an idea I’ve started using after seeing Teela Every Tuesday do it, and it is amazing. All you do is simply brush letter your word or phrase with your Pentel Aquash Water Brush Pen (I used Prang watercolors here). Then, while the paint is still damp, you sprinkle on your embossing powder. Let it dry and apply the heat gun like you normally would. And viola! You have this stunning effect! I recently used it in my October monthly spread and it’s got to be one of my favorite effects.

Add a Watercolor Backsplash
One embossing technique that is particularly versatile is by adding paint. All you need to do is create a design in gold and paint over it with watercolors. The paint glides right over the embossed gold, so you can combine these two effects in lots of unique ways! I opted for a basic color wash behind a simple phrase. If you’re not sure about adding watercolors to your journal, check out my tutorial on using watercolors in your bullet journal! I use watercolors in my Leuchtturm all the time, and it handles the abuse really well.

Create Golden Splashes
This was an experiment that I tried and it worked much better than expected. Taking the same idea behind sprinkling embossing powder on watercolor brush lettering, I splashed clean water on some watercolor paper with a round paintbrush. While the splashes and droplets were still wet, I sprinkled it in embossing powder. This showed all of the droplets on the page. Then I heated it with the heat gun and got this effect. I should note that water is not a great substitute for embossing ink. When I applied the heat gun, several spots of embossing powder blew right off the page. The finished result was still very cool, but it wasn’t a super efficient use of powder. Just a heads up!
After you create your gold splash, you can write over it – just like with watercolors! I used my pink Tombow Dual Brush Pen to brush letter right over the molten gold.

Affordable and Easy
It’s incredible how something so elegant and beautiful can be so easy to do. Once you get the basic set of tools, you can keep doing this for ages – you use so little powder for a single project. It lasts forever! And the powders are inexpensive enough that you can collect a few colors and have a huge arsenal of metallic effects at your command. I can’t believe it took me as long as I did to finally break down and buy my embossing tools. I hope some of these embossing techniques have given you a spark of inspiration! Now go out there and create some dazzling designs!
Did I miss any embossing techniques or tricks? Comment below and tell me how you would use your Midas touch in your life!
P.S. Sign up for the Fox Den Resource Library to get access to tons of free video tutorials, printables, worksheets, and more! I think you’ll especially enjoy the watercolor techniques video 😉


What temperature do you have the heat gun?
Great article! – do you know the longevity of the embossing? Will it stick on the page forever?
Honestly, Sarah, I’m not sure! I imagine after time, the sheen of the metallic might start to wear since it’s rubbing on another page in a closed journal. But I don’t think it will peel off or anything. I can’t be sure, though!
i understsand lol
Instead of embossing powder, can you use glitter? I think I have seen it used in place of the powder before. Have you tried this before? I want to know if it works before I buy the supplies, since I’m new to this.
Heat embossing is a bit different than glitter so the two wouldn’t really be used interchangeably. You could use glue and glitter and you wouldn’t need the heat gun for that one Hanna!
Hello!
Thank you for the ideas 🙂 I would like to decorate our wedding invitations with this technique but I’m not sure whether this works on shiny papers as well. The material is similar to photo papers but not that shiny. Do you think that it would work well? Thanks for the help in advance!
It sounds like you’ve got some beautiful invitations in mind, Dalma! To be honest, I have never tried embossing on slick paper before, so I’m not entirely sure. Looking around on some forums, I’m seeing some people say that it works with glossy paper, but not photo paper. I suppose you should just test it out! I will say that you shouldn’t put it on the outside of your envelope, as the process of going through the mail might scratch it up and damage it. I hope that helps a little!
This is a great tutorial, thanks! How many designs can you usually make with your average 1 oz jar of embossing powder? I am starting a big project and would love some direction as to how many jars to buy. 🙂
I’m so glad it’s helpful to you, Alexandra! Honestly, I don’t know how many designs you can make because I’ve never run out of embossing powder! You actually use a very small amount most of the time, it just looks like a lot because of all the extra loose powder. If you’re worried about it, I’d grab two, but you’ll probably be fine with just one!
this is really cool thanks!
I’m really glad you enjoy it, thanks for commenting! 😀
What makes the embossing ink/pen special? I’ve only ever done embossing with stamping– I had no idea that special ink or pens existed!
The ink inside the embossing pen grips the powder really well and stays wet for a long time. Normal ink (and water, too) dries really fast, and could let lots of the powder blow away like it did for the splash technique. The embossing ink stays wet long enough for you to get the design right, fix it if you make a mistake, and stands up really well to the power of the heat gun. I hope this helps!