How to Use Watercolors in Your Planner – A Simple Water Brush Pen Tutorial
Articles may contain affiliate links.

For people like myself who like to toy with the artistic side of bullet journaling, the water brush pen is an exciting new tool. There are a huge range of effects with this one little brush, and you can use it even if you aren’t an “artist”. Backgrounds, brush lettering, doodles, and much more await in this simple water brush pen tutorial. Let’s dive right in!
What is a Water Brush Pen?
This is the Pentel Aquash Water Brush Pen. Have you met? This tool is simple a watercolor brush with the water in a barrel. Basically, it’s the lovechild of a pen and a paintbrush. This means that it is extremely portable. The fibers of these watercolor brush pens are nylon, which makes them very resilient and easy to clean. You’ll notice some slight staining on the brushes, but they don’t affect the color of the paint. You can buy brush pens individually, but I bought the three pack so I can easily switch between sizes.

Before you pull out your planner and start going to town, you need to acquaint yourself with this tool. Try it on a piece of thick paper, like card stock or watercolor paper if you have it. The water brushes are quite wet if you aren’t used to them, so they take a minute to get used to. Try to hold the brush near the tip and not on the barrel, or you might accidentally squeeze it and add more water to your work.
Paint Materials
You can have as little or as few supplies as you want. Once you have the water brush pen in hand, you’ll need some kind of paint. I have lots of different things lying around that I will show you, but you by no means have to get them all. I’ll list them all right here so you know exactly what I’m using!


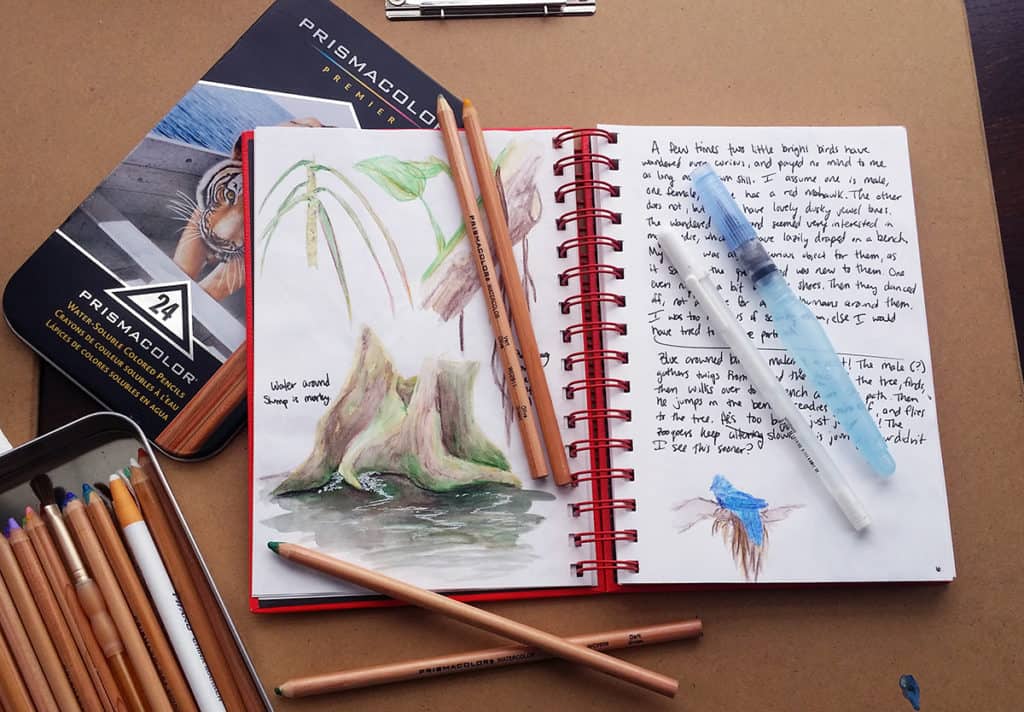
Prismacolor Water Soluble Pencils
Noodler’s Ink – 54th Massachusetts
Liquitex Professional Acrylic INK! – Iridescent Rich Copper
Putting Paint in Your Planner
This is the part that’s a little bit scary. It’s okay, though, as long as you are careful and you have plenty of paper towels on hand. First of all, what kind of journal do you have? I use a dotted Leuchtturm1917, which does surprisingly well with the wet medium considering that it is not designed for it. The water does make the pages a little bit wavy and crispy, but I don’t mind. In fact, I kinda like the effect. If you aren’t sure for your Leuchtturm, test this technique on a page in the back to see if you like it. If you have Moleskine or any other brand, I would refer to the reviews and customer questions – or, again, just test the water brush pen on some scrap paper or an inconspicuous back page.
Preparation is Key
Before you start anything, lay out all your supplies and make sure there’s enough water in your water brushes. For most of my planner painting, I use the Prang palette. The colors are nice and bold and I can mix colors in the lid if I want some exciting color combinations like the ones in my September monthly planner. Make sure the structure of your page is complete before you add the watercolor. I laid out my bullet journal and used a Pilot Razorpoint to draw out the borders. I should have used a Micron because the lines of the Pilot bled a little bit when I added water. Oops!

Wet the paint prior to the actual painting using a spray bottle. You could squeeze the barrel of one of the water brushes to add water, but be careful to not deplete the reservoir.

Here’s Where the Magic Happens
Now it’s time to paint! Ready?
To create a soft splashy design like this, start by putting a layer of clean water down on the paper.

Then, working very quickly, dip the water brush pen into the color of your choice. Hold it over the wet part of the paper and squeezed the barrel, releasing a few fat drops of pigment onto the page. Clean off your brush on a paper towel and pick up more pigment. Do this until you have covered the desired area – or feel free to swirl the paint around with the brush tip until you are satisfied. Be careful of over-mixing on the page, though, if you want to have several distinct colors in the finished product. Hold the page flat with one hand while you paint with the other. (Pro tip: it’s much easier to do this when you aren’t holding a camera with one hand).
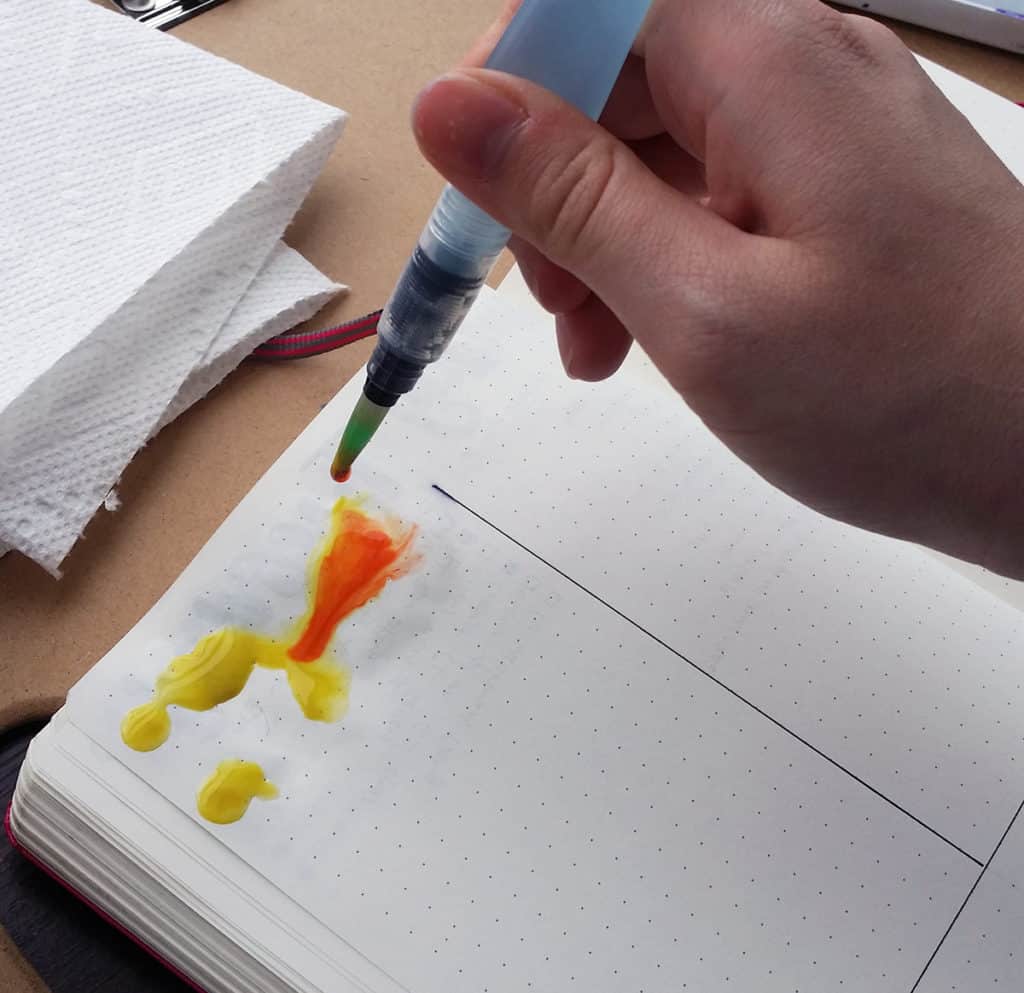
Let the paint sit on the page for between 30 seconds to a minute. Then take a clean paper towel and dab it up, trying not to smear your freshly laid paint.

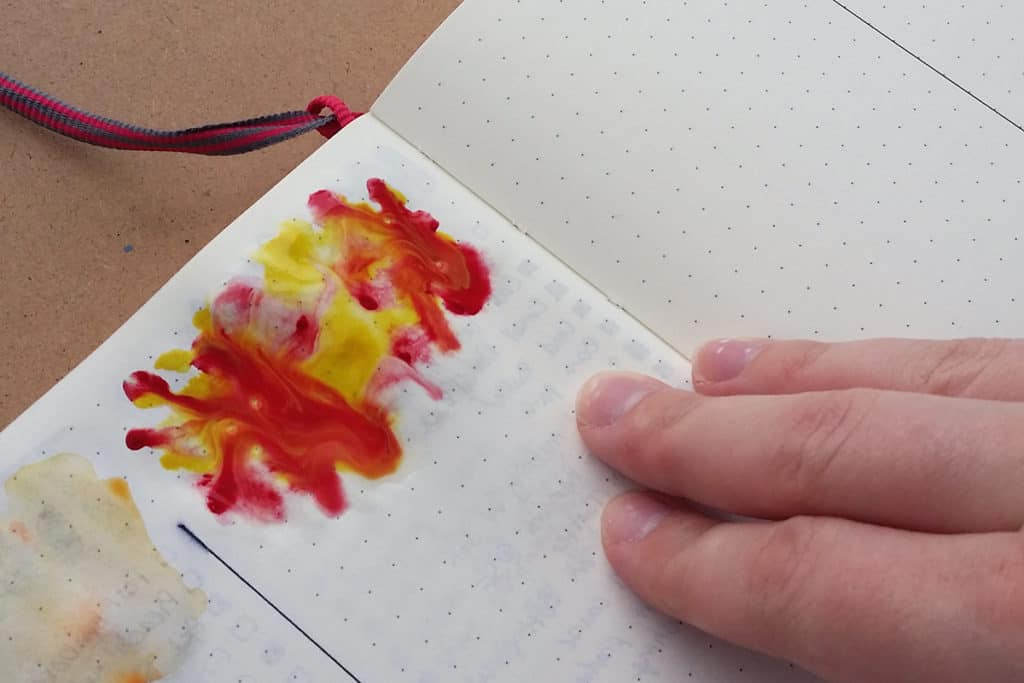
When you have dabbed up the wet paint, you should have a light stain of the colors you put down. If you want bolder colors, leave it on longer before you dab off the excess water. Note: You can’t let the paints dry naturally on the page like you can with watercolor paper. It would certainly wreak havoc on the paper and you would be disappointed with the result. Feel free to try it, but at your own peril.
(Update: I have a more recent post where I push the limits of a Leuchtturm1917 and a Moleskine with aggressive watercolor. Check out the results here!)
The image below has more examples of the same technique, except for the last one. All I did for the last one on the right was pick up blue and spread it on the dry page (no pre-wetting involved) from top left down to bottom right. Then I picked up green and laid it on from the bottom right up to the top left. This blended them nicely on the page and created a pretty neat effect. Of course, I dabbed off excess moisture after a moment just like the rest. But it should be noted that there is significantly less standing water with this technique.
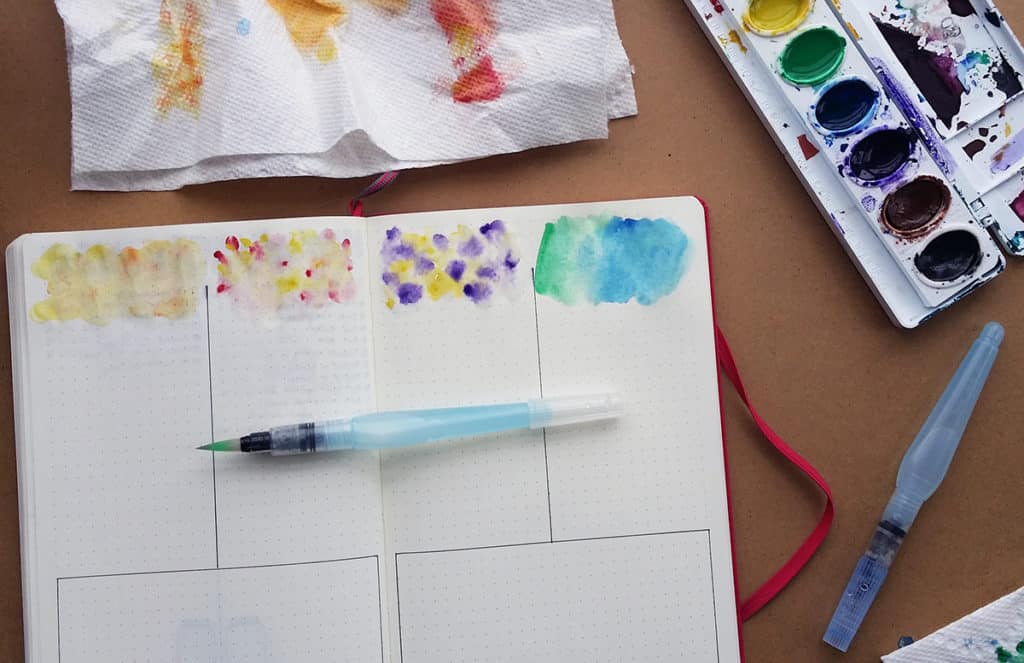
Finally, when the paint has dried completely, you can write the header. For me, I wrote dates. I would suggest you use something that is bold and dark to contrast nicely against the paint. I switch between Microns for fine lines and the Pentel Pocket Brush Pen for brush lettering.

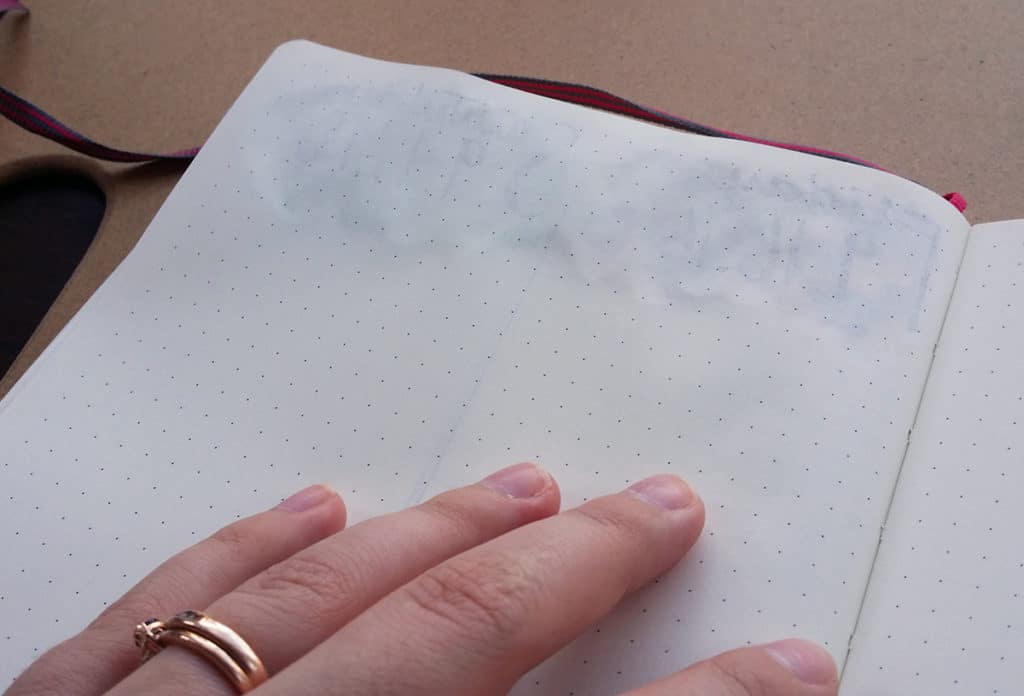
And just to show you how the paper takes it, let’s take a peek on the opposite side of the page. As you can see, there is minimal ghosting and no bleeding at all. Of course, the page is a bit wrinkly, but it’s still perfectly usable and you can write on it to your heart’s content. I’m tellin’ ya, the Leuchtturm is a champ.
Other Uses for the Water Brush Pen
So this water brush pen tutorial has only shown you one single use for this amazing tool. Check out some of these other mini-tutorials to explore the infinite possibilities!
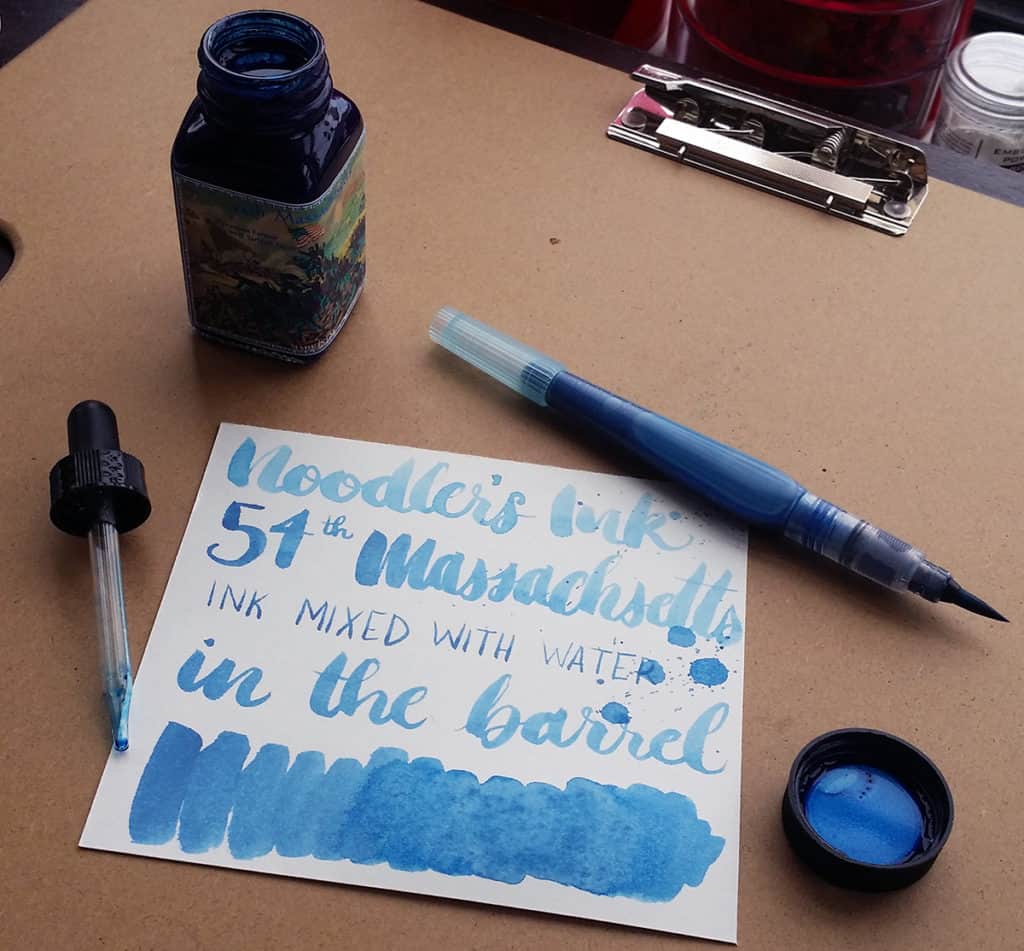
If you have a bunch of ink stores, you can avoid buying watercolors altogether and simply use the ink on hand. I have a big bottle of Noodler’s 54th Massachusetts, which makes it a perfect candidate to use in your water brush! You can use an eyedropper to fill the barrel of the water brush pen with undiluted ink or mix it with water, as I have done here. The ink will flow down to the brush and viola! You have yourself an inked brush pen!
As long as the ink is suitable for a fountain pen, it should be perfectly fine in your water brush pen. When you’re done using the ink, simply rinse it out, fill with water a few times, and squeeze the barrel until the water flowing from the brush is clear.
You can also create water that’s strongly colored with watercolor paints and put that in your water brush pen. I would recommend that you mix the paint and water in a dish and drop it into the barrel. If you try to add the paint straight into the barrel (particularly with tube paints), you may have a hard time cleaning it out.
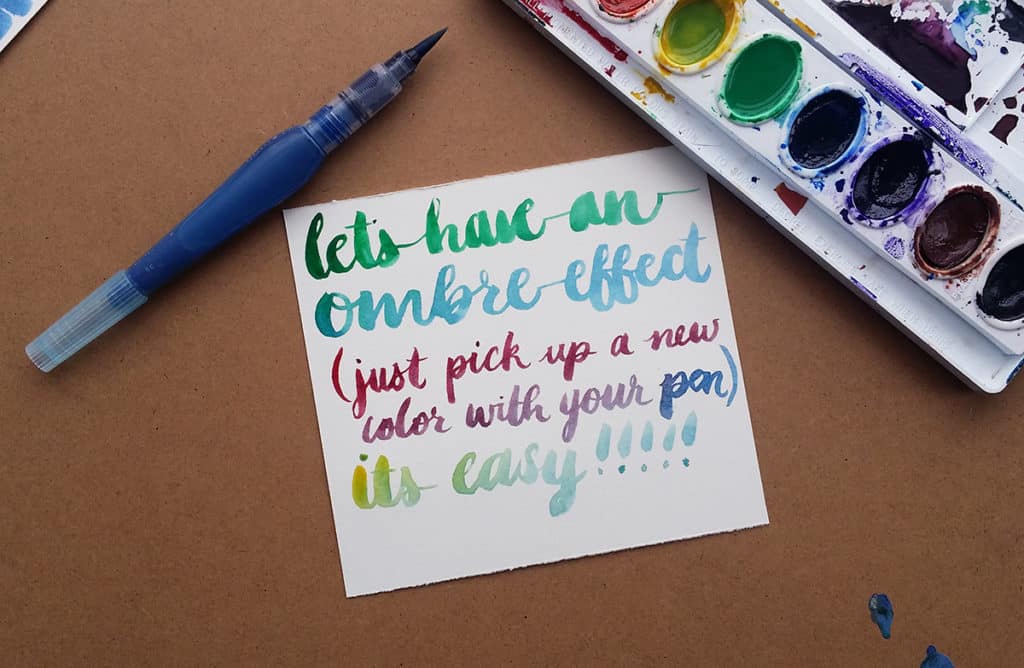
Once the barrel is filled with an ink or a watercolor pigment, you can create a really cool ombre effect easily. Just pick up a color with the brush and start painting/writing and the color in the barrel will start to become more dominant. Here I used ink in the barrel and paint on the brush, and it worked out magnificently.

Another fun thing you can use the water brush pen for is metallic paint! I recently bought this Liquitex Copper “ink” (it’s actually a type of acrylic paint) and I can use the water brush pen to apply it to anything I want. The water in the brush does dilute it a bit, but it makes the copper paint much easier to work with. It’s a bit thick and difficult to move on the page using a dry paintbrush. A word of caution – always wash your brush immediately after using this. It could dry and ruin the bristles on your brush, so don’t risk it! In fact, always be sure to wash your brushes after use. That just makes sense.

It’s kinda hard to see the metallic glimmer in photographs, so here’s a close up shot.

Actually Painting with the Water Brushes
Naturally, your water brushes can be used for painting actual paintings. I don’t typically use them for such, but I definitely have and I love them!
Observations in a Nature Journal
The water brushes are absolutely fabulous for on the go sketches. I use them all the time in my art account on Instagram @theoceanandthewoods. As you can see here, I used the Prismacolor Watercolor Pencils paired with the water brushes to complete gorgeous observations of a jungle habitat (in the Wichita zoo – unfortunately, I haven’t been to the real thing). When using this dynamic pair, I can draw the pencil on and wet it to get a watercolor effect, wet the tip of the pencil to lay it on dry paper, or wet the paper and the pencil to create a very soft effect. I also tuck a white Gelly Roll in there to add highlights easily.
I would highly recommend the Aquash water brushes and this Prismacolor set to any artist (or bullet journaler) who likes to keep their options open when traveling. It really is excellent.
Sketching and Painting
In addition to on-the-go painting, I enjoy reclining-in-an-armchair-and-watching-TV painting. I either balance the Prang watercolor palette on my lap or use the Prismacolor pencils along with my water brushes. Either way, I can easily binge on Netflix while painting to my heart’s content. It’s really easy when you use the Strathmore Mixed Media sketchbook, which can take the watery abuse. (BTW – I used the Pentel Pocket Brush to line this little painting of mine. It’s great for this kind of art!).

The Water Brush Pen is My New Favorite Thing
This simple tool has become one of my absolute favorite things. I truly think you will come to the same conclusion. I originally got them for brush lettering, but I’ve found it to be a Swiss Army Knife of use and efficiency. Really, this thing rocks. You don’t need to be an artist or a fancy smancy calligrapher to find a dozen uses for your water brush pen, and it can be a fun way to step out of your comfort zone. So why not give this a try? It will rock your world, my friend. And if you really enjoy using a watercolor in your planner, make sure to check out my video series A Month in Color!
P.S. If you want to see a video of different techniques for water coloring in action, sign up to the Fox Den Resource Library here!


Wow I just found your blog and I love it.
Thanks, Nina! I appreciate you stopping by!
I wanna say forst off, THANK YOU for posting this! I’ve looked for ages for someone to add watercoloring to their bujo and make a tutorial about how to do it.
I do wanna add a few things, as someone who is a beginner watercolor hobbyist:
-if you use one of those big binder clips to hold your page down and stretch it out, and leave it while it dries, it helps with the wrinkling
– cheap watercolor, I prefer Crayola, actually work better on non-watercolor paper such as in journals. I have some artist-grade watercolors that didn’t lay down pigment as well as Crayola, I believe because the color pigment in the artist-grade was heavier and the paper had no tooth, so it couldn’t “settle” into the page
– I like to outline doodles, such as a tree, with my Stabilo fineliners, then color it in with watercolor. My Stabilo’s actually bleed when used under watercolor, but I think it gives a pretty neat outline effect when I doodle
– quite a few watercolor tricks still work using them in journals, such as adding salt to wet watercolor, using cling wrap to get a cool pattern, using frisket to leave spaces white, or using a paper towel to get a cloud effect. You can find a lot of them on youtube
– water WILL reactivate the paint! I’ve made a few messes when using my journal after I washed my hands and tried to journal
– I found a Moleskine soft cover journal on sale at my local store and I use it for a “practice” journal since I’m too chicken to ruin my Leuchtturm. It’s handy to test a lot of different ideas, not just watercolor, but I do reccomend having a journal to “play in”
I really wanna thank you again for the post! I hope my comment can add a little to it!
Thank you for those extras! I had never thought of using a binder clip, but it sounds great! And I also love the idea of using traditional watercolor tricks like salt – I will definitely have to try that out and report back. Thanks, Candie! I love hearing that other people are having fun playing with watercolors and bullet journaling 🙂