Bullet Journal Setup Guide: Get Started Today (2025)
Articles may contain affiliate links.


What is a Bullet Journal?
This is a segment from my course, Artistic Planning For Beginners, on Foxsy.com. With a Foxsy membership, you can access this course along with 100+ others on subjects like watercoloring, creative journaling, hand lettering, drawing, and so much more. Take the first step toward making 2025 your year of creativity!
The bullet journaling system can be a bit intimidating, but don’t worry! This guide has everything you need to get started today!
Perhaps you heard the words “bullet journal” and became intrigued. Perhaps your friend showed you theirs and it’s got you curious for more. Or perhaps you stumbled here and you have no idea what on earth this thing is and you’re starting from square one. Good news! You’re in the right place. I’m going to walk you through exactly what it is, where it came from, and what it can do for you.
The bullet journal method is a planning system created by New York based product designer Ryder Carroll. The bullet journal (or Bujo) consists of several key elements: the index, monthly log, daily log, collections, and a future log. This guide will provide an in-depth example of each of these elements.
Essentially, it is a highly customizable planner system that allows you to plan for the future and track the past while making the most of the present.
Bullet Journal Guide Table of Contents
- 1 What is a Bullet Journal?
- 2 Terms To Know
- 3 Getting Started
- 4 Essential Supplies
- 5 The Basic Pages
- 6 Understanding Collections
- 7 Using Trackers
- 8 Minimalist or Artsy?
- 9 Dealing with First Page Fear
- 10 Finishing
- 11 Digital Bullet Journaling
- 12 Tips for Beginners
- 13 Frequently Asked Questions (FAQ)
- 14 What Is A Bullet Journal?
- 15 Who Invented The Bullet Journal?
- 16 What Do I Need To Start Bullet Journaling?
- 17 Is There A Best Time To Start A Bullet Journal?
- 18 What Are The Best Notebooks For Bullet Journaling?
- 19 What Are The Best Pens For Bullet Journaling?
- 20 Can I Bullet Journal Digitally?
What goes in a Bullet Journal?
While any blank journal can become one, not every planner in a blank journal is a bullet journal. There are lots of different planning systems that can occur in a blank notebook! This system has a few specific pages that set it apart (plus some extras if you want to spice it up – more on that later). For example, my watercolor planner is not a bullet journal because it lacks several of the elements of the system and adds a heaping dose of art. As long as you’re working with the system that contains the original elements laid out by Ryder Carroll, you’ve got a great bullet journal!
It’s important to remember that your bujo is not a diary, but rather a form of planner system that is meant to help you stay organized and be more productive.
Terms To Know
There are certain words that you’ll hear as you begin digging into the bullet journal system. Here are a few important terms and what they mean!
Migration
One of the core principles of this system is the ability to move tasks forward to new pages. This is called migration. If you find that a task didn’t get accomplished and you still want to keep it on your to-do list, you migrate it to your current daily page to keep it relevant.
Spreads
A spread is often said to describe the pages in a bullet journal. Most people tend to refer to two pages side by side as a spread. You often see monthlies and collections referred to as spreads because they sprawl across two pages.
Collections
A collection is a category page in your bullet journal that covers a specific problem or topic. This can take the form of a tracker, log, or simply a list. Collections allow you to better organize your journal without worry about it getting too disorganized and scattered.
Trackers
A tracker is a spread used to track certain information for a period of time. Trackers can span a week, a month, a year, or anything in between. There are unlimited types of trackers, but we’ll be covering some of the most popular ones below.
Monthlies
The word “monthlies” is just shorthand for monthly spread or monthly log.
“I love coming up with fun new themes for my monthlies!”
Weeklies
You might see weekly spreads or weekly logs nicknamed “weeklies”.
“I’ve decided to change up my weeklies format.”
Dailies
In the same fashion as monthlies and weeklies, people often call daily logs “dailies”.
“I track several things in my dailies, like my meals and my steps for the day.”
Rapid Logging
Rapid Logging is the term used by Ryder Carroll for the act of quickly capturing information and writing things down in a bulleted list. Essentially, when you sit down and quickly jot down your takes in your daily spread, you are rapid logging.
Getting Started
You might think that starting is complicated or difficult. Nope! Getting started is easy as can be. You just need the most basic supplies (which I’ll go over in the next section) and the willingness to make a few pages.
Which pages, you ask? You can begin anywhere! There is no right way to start.
You don’t have to go in any particular order. Pick whatever page excites you the most and jump in right there. Then add more as you feel like it. It’s easy to feel like you have to do things a certain way, but you are totally free to do whatever floats your boat!

Essential Supplies
What do you need to start? Before you run out and purchase a ton of stuff, I have some good news! You can start with pretty much any empty (or even half empty) notebook that you have lying around. And you can use any pen as well! If you want to use a fancier pen, then go for it. If you want to use a cheap pen that you accidentally stole from the bank counter, then that’s fantastic. Really, that’s all you need. A journal and a pen. You’re golden.
However, I have found that I am much more likely to use mine every day when I get some joy from the materials I use. That means that a nicer journal and some bright, funky pens are also a great way to get started and enjoy the process a bit more. I highly suggest that you find yourself a few materials that make you feel good and that bring you joy to use. If you love the supplies, you’ll be drawn to using your journal daily.
After many years of bullet journaling, there are a few products that I always keep with me. Below I’m going to share the staples of my grab-and-go bag. If you want a complete list of all my favorite products, make sure to see the My Supplies page!
Quick note: The only essentials I’m not adding here are my watercolor supplies. You may know I’m crazy for watercolors, so they appear in nearly all of my spreads. But I’m really wanting to cover the basics in this guide, so I’m excluding my watercolor obsession. If you want to know more about watercolors, though, head to this post to see my recommended supplies for beginners!
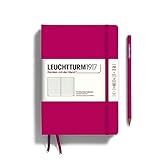
Leuchtturm1917
This hardcover journal comes in blank, lined, squared, or dot grid paper. For bullet journaling, I always choose the dot grid notebook first or the squared second. I never get lined paper! This journal has a pocket, two ribbon bookmarks, pre-numbered pages, and a blank index. And there are so many colors! With the Leuchtturm, you can always find something for your taste. I have bought this journal again and again, and I will always recommend it to newbies because it is lovely.
Update: I’ve found in recent years that the LT1917 has had a noticeable decrease in paper quality. It’s still a great journal, but perhaps it’s not for you if ghosting or thin pages bother you.
- The A5 MEDIUM notebooks are the perfect size with a wide range of colors making them ideal companions for all walks of life — this notebook series is perfect for midnight ramblings, daily entries,...
- Thread-bound to open flat which helps make reading the contents easy and adds efficiency to note-taking
- Features 80g/m² acid-free paper with high ink compatibility to help prevent bleed through, an expandable gusseted pocket on the back cover, 2 page markers / bookmarks and an elastic closure band
- Includes 251 numbered pages or our signature 80gsm with 8 perforated detachable sheets, a blank table of contents for easy organization and notes, also includes stickers for labeling and archiving
Faber-Castell Pitt Artist Pens
These are a great set of high-quality pens for your standard black lines. The pack comes in a variety of sizes so you can find the perfect pen for your project, and it even comes with a few brush pens as well! If you’re curious about brush lettering, this set of pens is a great way for you to dip your toes without jumping in.
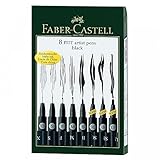
- PITT artist pens contain pigmented India ink that is both archival and acid free
- Perfect for drawing on the go!
- Convenient wallet keeps all your drawing tools together
- Pigmented India ink that is both acid free and pH Neutral
Zebra Mildliner Highlighters
I waited forever to buy these because I thought they would just be standard highlighters. They are anything but standard. The pens are dual tip, creamy to write with, and provide some unique and stunning colors. Since I’ve gotten these, I’ve been finding every excuse to use them because they are just too amazing. If you’re a student or you take frequent notes, I can’t stress enough how much you’ll love these.
No products found.
Pilot G2 Pens
If you’re looking for something cheap but sturdy, these are your pens. You can find them just about everywhere, and they come in a bunch of colors. If you lose one, it’s not the end of the world! They’re cheap, but not lacking in quality. I don’t use them as much as I used to since I have nicer pens and I’m a bit of a pen hoarder, but they are an excellent choice for newbies.

- Versatile: Colored pens for everyday writing tasks such as notes and grocery lists; G2 Pilot pens fine point smooth writing pens offer crisp, clean lines. These fine point pens are great for writing,...
- Power to the Pen: Express yourself effortlessly with Pilot's line of innovative writing tools, including colored gel pens, erasable pens, rollerball pens, ballpoint pens and fountain pens, & dry erase...
- Gel Pens Colored: A contoured rubber grip offers ergonomic support; 10-pack pouch of colored Pilot G2 pens for journaling includes an assortment of colors for personalized writing
- Smooth & Long-lasting: Enjoy a smooth writing experience with Pilot G2 Pens 0.7; the gel ink pen glides effortlessly, and G2 is the longest-lasting gel ink pen, reducing refill frequency (Data on...
Tombow Fudenosuke Brush Pens
I don’t want to over saturate this list with brush pens, but I use them a ton. These are pretty fine tip brush pens, meaning they can write in smaller spaces like a journal with ease. I use them for hand lettering, but I probably use them more for drawing straight lines and boxes freehand in my journal. I love these pens and take them with me everywhere!
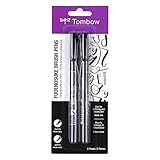
- Contains both the soft and hard tip Fudenosuke Brush Pens
- Features a flexible brush tip for different lettering and drawing techniques
- Create extra fine, fine or medium strokes by a change in brush pressure
- Great for calligraphy and art drawings
Wescott 6″ Ruler
While I prefer to draw most of my lines by hand, I always keep my ruler with me because I still need to measure things consistently! This is a super helpful tool that I reach for again and again, and the cork back really does make a difference.
No products found.
The Basic Pages
So you have your journal and pen at the ready. Let’s walk through each of the basic functions of the bullet journal and go through how to set it up. It might seem like a lot to do, but don’t worry! It’s a ton easier once you’ve got these basic elements set up.
Ruin the first page of your journal to dispel any new journal jitters. Write your contact info, a fun quote, or just scribble like a little kid!
Want to get your journal clicking smoothly right off the bat? Here are the five essential pages you need to try.
1. An Index
The first thing to create is the index. This super functional page, similar to a table of contents, is one of the elements that sets this system apart from the rest. Before an index, I used to flip around page by page looking for an old note or list. Now I can head to the index and see exactly where I put what with a fraction of the effort.
If you have a Leuchtturm1917, then the index is already right there waiting for you and the pages are already numbered. Excellent!
However, if you have another type of journal, you’ll need to add your own index and number your own pages. Just label the first three pages as “Index”. Turn to the next blank page after your index and begin numbering the pages starting at one. You can sit down and number the pages all at once or simply number as you go – whichever you’d prefer. As you add spreads, you’ll just need to update the index. That’s it!
Index Variations
You can keep your index page super simple if you want — just the page and its contents. But if you want to take your index to the next level, you can color code it or sort it by category. However you make it, the index is an essential part of the bullet journal system.

2. Future Log
In a pre-printed planner, you can easily flip six months ahead and jot down an appointment or plan for future events. With a bullet journal, you don’t have that ability. So how do you plan far ahead without setting up spreads months in advance? The future log is the solution!
Basically, this is just a page where you can write down any future appointments or dates for a month you haven’t set up yet. That way you can easily reference it to see if there’s a dentist appointment coming up or a deadline sneaking up on you.
How the Future Log Works
The future log is an easy spread to kick off a new journal. All you need is space to write down any notes for future months. You get to decide how many months you want to set up — it can be as few as three months or as many as twelve! You certainly can go further, but I’d recommend that you simply include a space for “far future” if you want to keep the ability to plan beyond a year.
Once you’ve decided how many months you want to prepare for, simply divide your page into equal sections for each month. Then simply label each section with the months coming up. As you get an appointment or note you want to remember, flip to your future log and jot it down. Then, when you’re setting up a new month, you can check your future log to ensure those upcoming events and notes get added to your calendar!
The future log is a great tool to help you remember important dates like birthdays, anniversaries, or any other date you may want to remember.
3. Monthly Spread (or Monthly Log)
One of my favorite spreads is the monthly spread! This is where you keep your month at a glance. Some people like to keep this minimal, opting for a list format in lieu of a calendar. Others, like myself, like a more traditional setup. I personally hate the list format because it doesn’t look like a month to me! For me, a calendar is easier and quicker to use because I have been using calendars my whole life. There is no one right way to set up a monthly — the only right way is what works for you! And there are more options than just a list or a monthly calendar. Page Flutter has a great post with examples of different ways to set up your monthly to your taste.
While there are lots of things you can add to your monthlies, we’re just going to focus on the basics here. For a successful monthly spread, you just need the calendar, list, or whatever layout you decide to use. Everything beyond that is gravy.
In Ryder’s video, he suggests having a spot to write down your monthly goals. Personally, I don’t add this list anymore because I never checked it. It simply didn’t help me plan, so I eliminated it a long time ago. In the end, it comes down to your preferences and what helps you plan best.

4. Weekly Spread
Weeklies aren’t discussed in the original system, but they’re a natural step between monthlies and dailies. Basically, you can plan out the next seven days in detail with one spread. Weeklies cover your schedule, appointments, deadlines, goals… you can pretty much add whatever you want! Some people use weeklies in place of monthlies while others use them in place of dailies. Occasionally, I see people using monthlies, weeklies, and dailies. To me, that’s a lot to keep track of. But if it works for you, then more power to you! There’s no planner police here.
There are a million fun ways to set up weeklies and experimenting with different layouts is a blast!

5. Daily Spread
Dailies are the workhorse of the bullet journal. Essentially, the daily spread is a to-do list on steroids. You write down all the things you need to get done today, all the appointments you need to remember, and any notes you need to keep. You can add as much other information as you want! Many people use their dailies to track water intake, meals, steps walked each day, etc. This spread is totally customizable for your needs.
Most people start off with horizontal dailies. That is totally fine and many people love this setup! However, I’d like to propose vertical dailies. I love vertical dailies because it allowed me to write my to-do’s like a list and I felt like I could add as much as I wanted. The difference might seem minor between horizontal and vertical dailies, but it can totally change the way you plan!
Creating a daily spread is really pretty simple. All you do is create a header for the given day and list tasks you need to get done. However, the biggest difference between a daily spread and a to-do list is the signifiers you include to the left of each task.
The original system used the following signifiers: a dot to indicate tasks, dashes to indicate notes, and circles to indicate events. However, I encourage you to come up with your own signifiers that fit your planning needs.
Understanding Collections
Collections are essentially a catch-all for everything else you’d add that doesn’t fit into one of the previously mentioned categories. Collections can be lists, logs, trackers, maps, info dumps, and much more. Basically, if you have a specific project you want to work on, a brainstorming session you want to explore, or a list you want to purge from your mind, then you’ll want to put those in a collection.
To set up a collection, turn to the next blank page or spread. Then add a header to the page to explain what the collection is about and add the information you want to write down. When you’re done, remember to add it to your index!
A Quick Collections Tip
Some people don’t particularly like keeping their collections right alongside their monthlies and dailies — they feel it can get messy and disorganized mixing the two categories. I often receive emails from people asking if there is a way to sort collections away from the day-to-day planning pages. I have two suggestions to help sort this problem out.
One is to keep a separate Collections Journal (which you can learn more about here). This is a totally separate journal to contain all of your collections nice and tidy.
My second suggestion is to start your collections on the last page of your bullet journal. As you add new collections, work your way toward the front of the journal. Keep doing dailies and other normal plans in the front, working your way towards the back. Eventually, you will meet in the middle with your planning and your collections. That’s when you can begin a new journal and start the process again!
Either solution is a good way to handle keeping your collections organized and separate from daily plans.
7 Collections Worth Having
Okay, so we’ve covered all the basics. You’re ready to get started with your bullet journal and get your new system humming along efficiently. Well done!
The basics are fun to conquer, but there are a lot more opportunities to explore and have fun with blank pages. And by that I mean collections! Not only can collections be a great way to explore new ideas, but they can seriously help you improve your life! None of the collections I’m about to share are exclusive to this system, but they are easy to borrow and add to your journal as you see fit. Here are some of my absolute favorites!
1. Memories Log
One of the strengths of the bullet journal is the fact that it becomes a time capsule without any extra effort. You can flip back through page after page and remember moments of your life through your goals, notes, and deadlines. But you can really lean into this trait by creating a memories log each month!
After each monthly, set aside space for your memories log. Then as the month progresses, make sure to jot down any notable events to benefit future you! This might not seem like that exciting of an idea, but trust me — we forget a lot more than we realize. Each month brings us little joys that so often they fade from memory because they were not big life-changing events. Or perhaps the memory remains, but we can’t quite place what month or year it happened. Keeping a memory log helps cement it into your own personal history!

The Memories We Forget
For example, almost a year ago I was sitting at my desk at work when I saw the funniest thing: I witnessed a squirrel drag a full slice of pizza across a parking lot across the street.
Some six months later, I was flipping through that journal searching for something when I found the squirrel memory. In that amount of time, I had already forgotten it! Did it change my life? No. Does it still give me a chuckle years after it happened? You bet!
I’m so glad I wrote it down so I can laugh about that damn squirrel for years to come. A memories page is a gift to your future self, and it costs so little energy and time. Why not do it?
2. Gratitude Log
I’m sure at some point you’ve heard that you should start keeping a gratitude journal. It’s one of those pieces of advice that we hear again and again, right alongside “drink more water” and “start meditating”. The reason this advice is repeated so often is that it really is true! Practicing gratitude through a journal or log is backed by research to be healthy for your mental health.
Despite knowing that, it can still be tough to start a gratitude journal. It’s hard to get behind buying a whole new journal just for this one purpose and actually remembering to use it. With the bullet journal, however, it’s perfect because you already have a journal that you use every day. Adding a gratitude log to your journal is a fantastic way to start counting your blessings every day.
Every night, I sit down and think up one or two things that I feel thankful for that day. They can be big or small, simple or complex. On tougher days, I find myself thankful that the day is nearly over or thankful for the strength to get through it. On good days, I am thankful for a happy memory or a good mood.
Over time, you begin to spot things you are thankful for throughout your day, forcing you to see the silver lining and generally altering your mood to be more positive. The gratitude log is one of my favorite things in this entire guide. This humble log will create mighty changes in your attitude if you give it a chance.
3. Affirmation Log
Where gratitude logs help you be positive in the face of your environment and circumstances, an affirmation log does something a little different. Affirmations help you change the way you talk about (and therefore think about) yourself. This exercise encourages you to say strong, positive, and happy phrases about yourself. With an affirmation log, you can practice this positive self-talk on a daily basis.
It’s easy to think negative things about yourself, to beat yourself up, to think you aren’t good enough. You are your own worst critic. But saying affirmations is a way to fight back and to treat yourself more kindly. It might sound silly, but it really works. When you tell yourself repeatedly, “I can’t do it”, you are only reinforcing negative beliefs. Instead, saying, “I can do it!” again and again, you begin to make a subtle shift in your attitude and beliefs. Keeping an affirmation log is a great way to remind yourself to do it every day and get the full benefit of affirmations!
4. Meal Planning
One of the biggest challenges I face again and again as an adult is figuring out what to make for dinner. I know I’m not alone on that front. Everyone hits this problem at some point or another!
Meal planning is one of those things that I always mean to get around to, but I often forget and am left to call in pizza or microwave some instant ramen. That is, until I figured out meal planning in my bullet journal. This kind of planning is really where this system shines.
You can easily meal plan in your journal and get a great idea of what you will eat throughout the week. This makes grocery shopping much easier and it takes away lots of the last-second guesswork in the evenings. It’s a godsend when I need to get my week planned out!
5. Master Grocery List
Want to know one of the most useful things I’ve learned? You don’t need to write a new grocery list from scratch for every shopping trip. You can write down your most commonly bought items and refer to it again and again. That means no more running to the store throughout the week to pick up forgotten items!
And the best part? You can keep it in one handy place! I ended up creating my neatly categorized Master Grocery List as a permanent fixture in my journal years ago. Since then, my entire process of buying food has become dramatically more efficient. Heaven knows how much time it has saved me over the years! It’s one of the most functional and handy spreads I’ve ever created.
6. Recipe Bank
Do you have a Pinterest board full of recipes you’ve saved but never looked at again? Me too! I found myself in a recipe rut a while back. We were cooking the same handful of recipes over and over, leading to food fatigue. I decided to find a solution and came up with the Recipe Bank! This system of cleverly placed Post It notes allows me to keep a bank of tried and true recipes alongside recipes I want to try.
With the Post It notes, I am able to stack a ton of recipes in a limited space and keep things flexible. If we try a new recipe and love it, I can peel up the sticky note and put it on the “Old Favorites” side. Or if we try a recipe and we hate it, I can simply pull the recipe out and throw it away. It’s much easier than writing it all down in pen and having to keep updated pages later down the line. This is a crazy efficient system, and it works perfectly alongside my Master Grocery List!
7. Goals and Rewards
For the longest time, I relied on other people to set consequences and rewards for my goals. Teachers, parents, bosses… all of them created quite the incentive to get things done. But once I got out of school and started working for myself, there was no one else to hold me accountable. I struggled for a long time to motivate myself and get stuff done. But then everything changed when I discovered this powerful trick.
Carrot Over Stick
Instead of trying to beat myself to working with the proverbial stick, I realized that I could tempt myself with the carrot instead. Basically, I set a goal for myself. Then I decide a small reward that I can give myself when that goal is achieved. These little rewards are quite powerful incentives! A small change in how I approach my goals goes a long way toward helping me get my butt in gear.
By the way – have you scrolled through all these pictures and been curious about how I do all this brush lettering? I have lettered in nearly every single page of my journal. And for good reason! It makes it feel like more than just a planner — it becomes an extension of my creativity! Plus, it’s just nice to look at, plain and simple. If you want to learn how to start brush lettering like a pro, check out my free hand lettering email course! If you are just wanting to dip your toes in the water, you can also check out my ultimate hand lettering guide to help you get started!
Using Trackers
1. Habit Tracker
I’m not being dramatic when I say that the habit tracker changed my life. As someone who has always struggled with building positive habits and shedding bad habits, this has been exactly the ticket for making a big difference.
In a habit tracker, you write down the habits you want to focus on — good and bad — and you track them daily for a month. Every night, you sit down and color in a box to indicate if that habit was present that day. For example, if you’re tracking your exercise habit, you can fill in the box if you exercised today. If you didn’t exercise, the box remains empty. After weeks and months, you can watch a pattern emerge and see exactly how often that habit is present in your life. Once you see that information, it becomes 10x easier to make changes because you remove any guesswork.
Though the habit tracker is not an original component of the bullet journal, I’d highly recommend you give it a try. Test it out for a few months and see if it helps you make positive changes to your habits. If it helps you half as much as it helped me, you’ll keep this tracker around for a long time to come.

2. Health Trackers
Another great addition to your journal is some kind of a health tracker. You can track all kinds of health-related information, like sleep, hydration, calories, steps, symptoms, periods… the list goes on and on! If you’re wanting to focus on improving your health or maintaining some kind of condition, a health tracker is a simple way to do just that.
3. A Year In Pixels Mood Tracker
Whether you are battling mental health problems or you simply want to encourage a brighter attitude, a mood tracker is an amazing way to see your mental patterns. This bird’s eye view of your mood can help you see patterns you might otherwise miss. Once you understand your own personal patterns, you can account for that and take steps to make sure you are healthy all year long. You can opt for a monthly tracker or do a full year in pixels mood tracker to see the entire year at a glance!
4. Weight Loss Tracker
Losing weight can be a tough battle — especially because it can take so long! It’s easy to feel demoralized because you aren’t seeing progress fast enough. That’s why I decided to start a weight loss tracker when I was struck with the same issue. This fun visual page allowed me to celebrate my victories and slowly add more color to the spread. It gave me a sense of accomplishment and joy when I could fill in yet another box, working toward more long term goals. That made my weight loss all the sweeter as I worked toward my goals!
5. Financial Planning
If you’re anything like me, financial planning is a snore. I just can’t find a way to get excited about a budget! However, I do understand how important a budget is, so I make it happen in my bullet journal. That’s why I try extra hard with financial planning spreads to make them engaging and fun!
One way to help me think about saving money is by thinking about how I will spend it. Imagine your dream vacation. Where do you want to go? What do you want to do? Think about your dream destination and then ask yourself why you would want to wait for that trip. Start planning and saving now! The sooner you begin budgeting, the sooner you can go on the trip of your dreams.
6. Travel Tracker
The bullet journal is wonderful for tracking mundane day-to-day stuff, but it’s also fantastic for helping you see the bigger picture. Want to travel the world? Start tracking it! This visual page will help you get excited about your goals and give you some perspective on what you’re working for. There is nothing more satisfying than coloring in a country that you just visited!
Minimalist or Artsy?
Looking at all my colorful, artsy pictures throughout this guide, you may feel intimidated. Is that the way you have to bullet journal? Of course not! Your style can vary wildly from mine and that is perfectly okay. Your journal can be rough, sketchy, simple, extravagant, colorful, colorless, or anything in between. Over time and with use, your style will emerge. It may even change page to page! Let’s go over some of the basic styles so you know what kind of look you might like to aim for.
Minimalist
A minimalist journal is simply one that you keep very simple. This might mean that you only use black pens and use clean, even lines for your spreads. Or perhaps it means that you keep your colors limited, only using small accents of color to emphasize important information. A minimalist journal could just mean that you don’t care at all about the aesthetics and you just write freely, messy handwriting and all.
If this appeals to you, then that’s fantastic! There are some amazing minimalist out there that are both beautiful and functional. As long as it works for you, it’s perfect!
Artsy
If minimalism bores you and you crave color, shapes, patterns, art, and lettering, then congratulations! You fall more into my camp, which I call camp maximalism. Don’t get me wrong, I love minimalism in other people’s journals. But I just can’t stop myself from making all kinds of bright spreads — and if you feel the same way, then that is marvelous. Embrace it!
Beauty for the Drawing Impaired
Perhaps you love the idea of making bold, colorful pages, but you find yourself stuck. Is drawing not really a thing for you? Maybe you’re learning how to draw but you’re still a beginner. Maybe you aren’t interested in learning to draw at all! Either way, fear not. There are still plenty of ways to make yours pop without becoming an artist.
Here are a few ideas:
- Get a set of washi tape and use it to decorate and divide your pages.
- Use stencils to create shapes, lines, and other elements with precision.
- Stick snippets from magazines, polaroids, tickets, and other odds and ends in your bullet journal.
- Create watercolor washes to fill in shapes and spaces. It requires no skill and looks magnificent when it dries!
- Use highlighters and markers to draw lines and other simple shapes for pops of color.
- Buy stickers and use them to set up spreads or just add some gorgeous art.
Get Artsy Fartsy
Maybe the idea of drawing or painting in your journal excites you. I don’t blame you! It’s super fun to get creative, try new ideas, and go nuts adding all kinds of color and design to your pages. For me, getting artsy in mine has had a major impact on my life. Playing with art in my bullet journal was the catalyst to me getting back into art after a many-year absence. Because of that shift, I feel inspired to try new artistic endeavors, grow my drawing skills, and enjoy this hobby as much as I did as a kid!
And on a more practical side, getting artsy encouraged me to use it day after day. When I kept my planning simple, I struggled to use it daily. But once I started experimenting artistically and enjoying the process, I was excited to update mine every day. So in the end, art was really the ingredient for me that made daily planning stick!
On Planner Snobs
Some people may try to tell you that it’s a waste of time or isn’t a “real” bullet journal. Here’s a piece of advice from someone who’s been doing this for many years now: they’re full of it. Your bullet journal can be whatever style you want. As long as it works for you and it makes you happy, you’re golden.
There is no “right” way to do this. This system is designed to be completely adaptable to each unique user. There is no such thing as being too minimalist, too colorful, too fancy, too rough, too ANYTHING.
If anyone gives you a hard time because your journal doesn’t fit their narrow parameters, shrug it off. Say, “Okay!” and move on. In my experience, this criticism comes from a place of jealousy. Some people can’t handle other people enjoying something differently than themselves, so they make a big stink over nothing. Just know that this type of snobbery doesn’t reflect on you or your system. They’re just grown-up bullies trying to be jerks over something you enjoy. Those people aren’t worth your time or energy.
Dealing with First Page Fear
You’ve read up on the basics of the bullet journal. You bought your supplies. Now you’re sitting in front of your new journal and you open to the first page only to hesitate. You think to yourself, “What if I mess it up?“
This is what I like to call First Page Fear. Something about the blank first page of a virgin journal can strike crippling anxiety into your heart. You suddenly doubt yourself and fear that you’re going to ruin the whole journal. You feel immense pressure to get this just right.
Toxic Perfectionism
First Page Fear is simply perfectionism in disguise. Perfectionism is often touted as a positive attribute, something that shows that you have attention to detail. But that simply isn’t true. Perfectionism is an incredibly toxic attitude that is based entirely in fear of failure. This fear will not only stop you from finishing projects — it will stop you from ever trying. Because perfect isn’t possible. You are human and no one expects you to be perfect. So don’t put that pressure on yourself!
Done Not Perfect
When you find yourself terrified of making a mistake, say, “Done Not Perfect” and push through anyway. The only way for you to get better at this is to actually DO it. Try, fail, tweak, and try again. My journals over the years are absolutely packed with mistakes. I have misspelled month names, drawn something funky, misaligned a header, smudged ink… if you can imagine a mess up, I’ve done it. Despite all of those imperfect pages, I got stuff done. No matter how many imperfections I saw in my own journal, people still seemed to love the pages when I shared online. I’ve grown so much thanks to all my mistakes, and you will, too. So take a deep breath, put that pen to paper, and don’t overthink it. You’ll do fine. I promise.
Finishing
If you start with a half-used notebook or you’re just a fast worker, you’ll run out of pages before too long. So what do you do when you get to that point? Many have been stumped by this issue because they are unsure what to migrate to the new journal. I’ve moved journals multiple times, and it’s not as hard as it seems. You just have to think about what you liked the best and how it can serve you in a new journal.
Think about the systems that worked for you. If you loved how weeklies helped you take charge of your to-do list, then keep that system rolling into the next journal. Did the calendar monthly layout fizzle for you? Consider trying a new design in the future. Some elements to consider switching up in your new journal are things like the index and future log, which can impact the whole journal’s function. This is a good opportunity to experiment with a new style to see if it works better for you.
Migrating Collections
As many people move to a new journal, they have to think about what to do with old collections. Do you rewrite them all in the new journal? Do you leave them behind? For everyone, this answer will be different. However, there are some things to consider. Is the collection a one-time list or something that you use again and again?
For example, I use my Master Grocery List for every grocery trip. Because I use it so often, it only makes sense to rewrite it in my new journal (perhaps with a few updates). But a different collection, such as a packing list for a work trip, is something I don’t need all the time. If I need to refer to it later, I can check the index and easily find it in my retired bullet journal. Then I may decide to rewrite it in my new journal for easy reference.
A Quick Tip for Migrating
If you’re not sure yet, try this. Flip through your retiring journal and note any collections that you think you may need in your new journal. Keep them on a sticky note — or, better yet, make a new collection in your new journal with this information. Then if you end up needing it, you have a very quick reference as to where you can find that old collection so you can copy it over. If you never need it, then you won’t need to copy it. Try this through a few journals to get a sense of what is really needed during migration so you don’t waste your time copying everything over.
Digital Bullet Journaling
Something that has cropped up in the last few years is the digital bullet journal. The idea of going digital seems to be contrary to the original idea, but it actually offers some very interesting opportunities that paper cannot. Let me summarize how going digital works.
The Basics of Digital
I’m sure that there are several different methods out there for creating a digital bullet journal, but I’m just going to go over my own system.
Digital Materials and Software
How to Go Digital
Essentially, I use the Apple Pencil with my iPad to have all the benefits of writing information by hand — but all with the convenience of digital organization. After creating my own planner template in Photoshop, I imported it into Goodnotes. Then I used it just like any other journal. I would write monthlies, collections, lists, and everything else on new pages that I add as I need them. To move around pages, I can swipe pages sequentially or go to the digital index to find the page I need.
For more intricate art, I would use the Procreate art app to make whatever my heart desired. Then I would export the art as a PNG and bring it into my digital planner. The benefit of this method is that I can create a doodle or nicely lettered header and use it again and again.
Over time, I have turned mine more into a business planner than a personal one. For more personal planning, I have reverted back to my paper journal. I have been using this method for a little over six months in addition to my paper one, and my system is still very much in development.

Tips for Beginners
Before this guide wraps up, I want to impart a bit of wisdom for any beginners. I’ve been using the bullet journal for around six years now. On top of that, I run a business full-time, focusing a lot on the bullet journal. I have learned a lot about the system that I wish I had known when I first started all those years ago.
1. Don’t Overdo It
Ever had it where you fall in love with a song, listen to it on repeat for days, then find yourself tired of the song and sorta hating it? You might be tempted to do that with the bullet journal.
If you’re starting for the first time, you will likely want to try all the things. My advice to you is to hold your horses and try to keep yourself from sprinting into every spread, collection, bullet journal template, and tracker you can think of. You might get yourself overwhelmed to the point of just scrapping the whole thing and giving up.
Instead, try to go slow. Start with the basics and work with them for a while, getting used to the process of keeping up with your dailies. You can add a few collections here and there, but nothing recurring (aka nothing that requires commitment). As you get more comfortable with yours, try integrating new things slowly. You probably don’t want to add more than one tracker or log per month. After you get into the rhythm of things, you can begin to go nuts knowing that you have a solid foundation to lean on.
2. Give it Time
You might expect it to work overnight. It won’t. I actually used mine for over a year before I really felt like I hit my stride. You won’t see big changes right away, or even after a few weeks or months. This is where patience comes in. You need to give it time to work and integrate into your life. Give yourself time to adapt and develop new habits. Don’t ditch it because it didn’t solve all your woes in a snap. That’s not fair to the system and it’s not fair to you. It’s worth the wait, I promise!
3. Don’t Compare
When you’re just starting out, it is extremely tempting to compare yours with a more developed bullet journal. This is a great way to feel self-conscious about your work and kill your planning in the cradle. Instagram, Pinterest, and Facebook are all great resources for inspiration – not to mention the plethora of blogs that cover the topic! It’s wonderful to borrow ideas from other folks in the community, but don’t beat yourself up because your work doesn’t look just like that lovely stylized picture on Insta.
We all started at square one. Even me! Here’s a throwback to my very first bullet journal, which looks absolutely nothing like my current journal. If you want to develop your style and your bullet journal’s functionality, then the best thing you can do is practice. That brings me to my final piece of advice…
4. Experiment and Practice
The only way you are going to find the best bullet journal for you is to practice, practice, practice. I know that probably isn’t what you want to hear, but it’s true! You aren’t going to get any better by imagining all the cool things you can write on your pages – you’ll get better by trying.
Layouts aren’t going to get more efficient if you stick to the same thing forever – they will evolve when you experiment and try new stuff. I’m not saying that you have to constantly rotate out layouts and spreads. I’m saying don’t be afraid to change a few elements here or there. There have been several times when I was hesitant to try something new, only to find that I loved the change and kept it long-term. So play around, and don’t be shy about mixing it up! Just keep turning the page and keep working at it.
The bullet journal is a beautiful multi-faceted thing, and there’s no way that I could possibly cover everything in this guide. But I do hope this post serves as a jumping point for you to start yours with confidence and joy.
The best thing that ever happened to me was realizing that productivity and fun could work together to create something truly spectacular. My life hasn’t been the same since!
Now it’s time for you to grab your journal, pick up a pen, and dive in. What are you waiting for?


I just finished setting up my first bullet journal and it seems like a great tool for planning, I used to only make a list for the day but this seems much better, now I’ll just try to stick with it which idt will be that hard and find what I like the most, experience with it as you said. You explained everything really well and help a beginner like me a lot so thanks a lot for this and keep going!!!!
I’m so glad you found this helpful, Bryant! I hope you continue to find new ways to make your bullet journal a great addition to your planning habits!
How long do you think 80 pages will last? I am bullet journaling from a notepad I found at a yard sale instead of those expensive ones and it’s 80g/m2. Will it last?
It really depends on how heavily you use it! I’d say if you got it for a good price, try using it and see how it feels. What you learn with this journal will inform you what your journaling preferences and habits are, which will inform your next journal purchase. Good luck!
I’m also a Year 9 student – and being me (I also do this) – I found a new website and started a craze in the class… This website (I’m sorry Shelby) wasn’t Little Coffee Fox but was Notebooktherapy. They are more of a selling website more than something as incredible as this website ! I had a Ball Point Pen (which I used for art) which I used it for my BuJo and haven’t changed pen since! (Apart from three versions of the same one😂) I only had a thin paged, paper fronted Cross lined pad to use – but to me it was the best thing in the world! So I started…Didn’t find this website or any others till The next month (seeing I start in the middle of the year)! Messed up loads and when I look back I laugh but enjoy it! It was so much fun! I just had a birthday so I got a brand new proper BuJo! Its PepaLani – which I had never heard of before- and its really increds! Since I found your website, I got hooked on it and love it so much! I use it loads, but have a hard time because sometimes I just want to BuJo and so don’t my piles of homework done, or I want to try out 10 billion different things at the same time (well that’s a bit exaggerated but still!)… I’m trying to stick to two new things a month but find it hard… I also find it hard to make up my own spreads … Loads of my friends keep BuJos and I love that because it supports you to keep going but at the same time when they show you their (they do!) it gives you that sinking feeling like ‘I wanna chuck mine in the bin’… They are soooooo ARTY! How do I give myself belief in my own work? And How can I control my excitable character to only doing a couple things without wanting to start over😄 Thanks for all you give me inspiration abt!
I’m so glad you’ve found this system and you’re so excited about it! Your excitement is palpable 😃 I know it can be easy to compare your journal to others and feel a sense of disappointment in yourself. If it makes you feel any better, I feel it too. It’s a totally natural and entirely unhelpful feeling that all creators have.
The best remedy, I’ve found, is reminding yourself how much you’ve grown. You should only ever compare your work to your past work — because you’re the only one on this journey. Everyone else is on their own!
And when it comes to excitable behavior and trying everything, I understand that too. I think you’re doing okay on that front. If you’re excited, it will be tough to rein yourself in, but you’re already giving it an effort, so you’re fine. You can always keep a few pages in the back of your journal where you can write down or doodle future page ideas so you can continue using those ideas long after they struck you.
The most important thing is that you’re having fun and (hopefully) finding the bujo useful as a planner. Remember to keep making mistakes and enjoying the process 🙂
One of the most comprehensive guides, for newbies like me. In fact, I have several sets of gel pens and bullet journals too. But I am far from this perfect art.
I’m so glad you enjoyed the article, Addison! Remember, it’s a journey 😉 everyone has their own spin on it, their own style, and their own timeline. As long as you’re happy with how you use your journal and you feel like you’re making progress, you’re doing amazing!
I love this! You put so much work in making it informative, thank you!
Thanks so much for reading, Chantal!
What an amazing read. Buller journal is essential for improved productivity. I just started my own blog on Bujo and luckily I found such an in-depth guide on the bullet journal. Perhaps, this is the best guide I have ever come across.
Thank you for this
I’m so glad you enjoyed it, Jasmin!
Hi, Great guide! I’m just at the end of my first month. Can you expand on the process of monthly migration? I’ve read it’s core to the practice, but not much in this guide about it – you have been helpfully thorough in migration to a new journal.
How do you approach monthly migration – moving your tasks forward, back to future log, reflecting etc
thanks again,
Gav
Hey Gav! I have a whole post that details the way I migrate my journals here: https://littlecoffeefox.com/bullet-journal-switch/
Hope that helps!
Do you make your monthlies and weeklies in order and then add the other pages after them? Like a full calendar year then everything else, or just as you go along you fill it in? Does that make sense?
I fill it in as I go! Usually, I create a monthly, then create each weekly as I need them. Occasionally I’ll feel proactive and create two weeklies at a time. Some people fill theirs in further into the future, though! It’s really a personal choice, not a right or wrong way.
Thank you for this. I have tried bullet journaling before and I appreciate your “go get ’em” and “just be you” approach to teaching.
Thank you, Catherine! If there is one thing I’ve learned from bullet journaling over the past several years, it’s that there will ALWAYS be other amazing journals shared online. Comparison is the thief of joy, and comparing your bullet journal to everyone else’s will only ruin the experience. So there is nothing left to do but make it your own and make it fun 🙂
This is way more than i expected from a cheat-sheet! when i first saw BuJos online, i thought it was a silly frilly fad. now i’m going to put my life into one. 45 year old male! ha! having discovered that i likely have ADHD, or most of the ingredients, it seems like a BuJo will help me out a lot. i’ll be coming back to this reference again and again – so many great ideas and examples, simple and fancy ones. thank you so much!!!!!
I’m so happy to hear that! This system has so much potential. I hope you find the right combination so you can hit the perfect productivity stride 🙂 Good luck, Greg!
Hey, Shelby!
I couldn’t thank you more. What a perfect post!
Thank you for sharing!
xoxo
I’m so glad you enjoyed it, Sabrina!
Hey, So I am wanting to tostart a bullet journal. I have all the supplies ready and I am stuck what is the first page I should do?
Ella
If you’re stuck on the first page, then I have a post that will definitely help you! It’s got some suggestions for things to put on that tricky first page: https://littlecoffeefox.com/how-i-conquered-the-first-page-of-my-bullet-journal/
When you watercolor wash a page, do you take it out of the journal or do you fo it there? Also, how do you keep the water from ruining the page behind it?
I just paint straight in the journal and I haven’t had any issues yet! I don’t do anything special to keep the page behind it usable. Often there is a bit of ghosting, but I have many a time painted on both sides of a page and it worked fine. I’d always recommend you test a page in the back of your journal to see how the paper reacts if you want to try it yourself! I’m also offering a free webinar about how I watercolor in my bullet journal for later this week if you want to check it out: https://event.webinarjam.com/register/20/8vl9vcx
I am new to the bujo craze. I am conflicted about how to combine both my personal and college life into one journal. Then, I feel overwhelmed knowing that I will have to stay on track with two separate worlds. What are ways that I can combine so that the two worlds do not get confusing and cause me to become overwhelmed and give up? Halp!
I have heard that some create two journals, but that itself is overwhelming. I feel that I will get out of sync with having to flip from one journal to the next in order to piece my life back together. What suggestions do others have or does anyone else feel this way?
That’s a great question, Angelica! Different people will have different solutions, so you’re probably going to have to do a bit of trial and error to find what fits for you.
I’d suggest some variety of color coding or setting up your index to keep the different categories of your life separate. Here are a handful of ideas for ways you could accomplish this: https://littlecoffeefox.com/bullet-journal-index/
Overall, if you’re afraid of the potential chaos of having two journals, I’d suggest you stick with one. You can always add a second one later if you feel like it! I hope this helps, Angelica ? Good luck!
Can I just say I LOVE THIS! As a naturally unorganized but very creative and artsy middle-schooler I found this process to be fun and helpful. However I am using a sketchbook as my journal, is that okay or should I switch to a regular journal??? Anyways thanks for this article I loved it and I’m sure more people will too!
Thanks so much, Nakeli! You don’t need to worry about switching to a regular journal. If you enjoy using a sketchbook and it works for you, then keep on rocking it! There is no right or wrong way to do this — just do what feels right to you.
Hi!
I was just wondering do you use one bullet journal for work and another for personal or does everything go in one? What’s your thoughts? I’m in the throws of setting myself up for the very first time and haven’t been able to figure this one out.
Hey Ana! That is a fantastic question. Personally, I keep my personal stuff and my work stuff separate (with a little bit of crossover between the two). For example, I’ll add some kind of social event to my work calendar so I know not to work too late that day, or I’ll mark important work deadlines on my personal calendar so I don’t forget and let it sneak up on me.
But I did keep them together in one journal for a long time, and that is a perfectly valid way of going about it! It’s really up to you and your preferences. I know some people keep a bullet journal strictly for work and it stays in their desks when they leave to go home, then have a personal one for meal planning, family activities, personal growth, etc.
If you’re just getting started, I would suggest you try keeping both work and personal in one bullet journal for now to keep things simple. Then, as you grow and learn a bit more about your planning style, you can separate them out pretty easily. One of the hardest things when you’re new to bullet journaling is using it regularly. I’ve found that keeping it simple in the beginning makes it easier to use it every day.
I hope that helps, Ana!
Inspirational ideas! Just wanted to ask if I’ll be able to use a bullet journal as a diary as well – for instance, to write down my thoughts each day – and also if you have any suggestions on how I can execute this well and efficiently.
Of course, one of the best parts of the bullet journal is the ability to customize it to fit your needs. You could do so by using an affirmations or gratitude log, but if you wanted a simpler solution you could always just add a “Random Thoughts” section to your daily set up.
I’d just like to make a suggestion. You will easily increase your readership if you use a darker font. I read your very first entry and had to stop before it was done (only 3-4 sentences) because the strain is far too hard on my eyes to see. There is a very significant portion of the population with at least mild to strong Vision limitations who will bypass your blog (and of course the over 40 crowd requiring reading glasses that do not give the sharpest vision) It’s unfortunate because I’m sure you put a lot of work into providing great public information. Just a suggestion from someone who has to bypass your blog
Pam,
Thank you so much for bringing that to my attention! I will look into this as soon as possible. I really do appreciate it, as this is something I would have never even considered.
Just another quick follow up, I’ve made some changes to the font to make it a bit darker and a bit bigger, please let me know if that helps!
Best,
Shelby
Accidentally by pass to your blog today when I searching about bullet journal , I love your blog and the font really easier for me to read . the bullet journal information help me a lot ! I guess I will start my journal very soon. thanks for the useful blog .
I’m glad you found the guide helpful! Good luck on starting your bullet journal!
Thank you! Much easier to read! WOOHOO!
You have some great advice here! I first began bullet journaling as a way to help with my ADHD and it’s been a great help. I always bought a standard planner but they never catered to my specific goals or tasks. I was intimidated in the beginning because of all the beautiful artwork. Now, that I’ve had plenty of practice I’ve gotten more creative.
Marie,
I’m glad you found this guide helpful! The bullet journal is really a great tool. The flexibility it provides can make it so much easier to make it work for you rather than trying to use a prebuilt system.
How do you get past the fear of someone making fun of you for doing it in school , i had a planner in 6th grade and was made fun of horribly for it , and got my planner ripped up after school , im now in 9th grade and want to use a bullet journal but am worried that it will get ripped up to as im in multiple classes with people who are known to be bullies and I dont want my 24$ leuchtturm official bulet journal to get ripped up.
Any advice would be ok.
That’s horrible, Preston! I don’t blame you for being nervous about it, I’d feel the same way.
I doubt those bullies would dare mess with your bullet journal right under the nose of a teacher, so you could exclusively use it in classes. When you put it in your bag, sandwich it between other books so no one can easily snatch it out of your bag. If you are too nervous to take your bullet journal into certain classes, you can keep a Post-It pad with you. Write on the Post-It during school, then move over your sticky notes into your bullet journal when you’re away from the bullies. Also, if you want to test whether anyone is going to mess with your bullet journal, you can try buying a cheap journal for a few dollars and use that at school for a month or so. If no one tries to destroy the cheap one, then you can feel more secure about bringing your nice journal. If people do try to destroy it, then it was only the cheap one and you can keep your Leuchtturm safely at home.
I’m sorry that you have to deal with bullies at all, but some people are just bitter and mean. I hope you find that people don’t tease you about something that makes you so happy, but if they do, know that you’re totally normal and they’re just jealous. It does get better the older you get, I promise!
Hi Preston,
I read your comment and it made me incredibly sad.
No one should be made fun of at all, especially for something that makes them happy.
I hope you are doing your bullet journal if it brings you joy because you should never let someone stop you from doing what you love. I’m in college and I love doing mine, definitely give it a try!
Hopefully everything turns out fine!
Oh no!!!!!! That is horrible.
No one should be make fun of that. People love bullet journaling like you and me. Want to stand up to yourself? Tell those bullies that you love your journal and tell them that they won’t rip it. Good luck!!!!
What weight of paper do you use? I bought 28 lb and the zebra midliners bleed through so much that I wouldn’t be able to use both sides. I am interested in creating my own journal in a binder using 8.5 x 11 inch paper. The 28 lb paper is pretty heavy maybe I need different markers, is there another brand you have found that works well and doesn’t bleed through?
Thank you so much for any info. I’m excited to get started, love all your beautiful journal samples!
Lisa
Lisa,
My go journal is the Leuchtturm1917 which has 80 gsm paper (so I believe about 24lbs) it definitely ghosts, but it does not bleed to the extent that the back of the pages are unusable. I even use watercolor paints in it and use both sides. You can see my full review of the Leuchtturm1917 here.
thanks for your post, there’s some brilliant ideas and tips contained within it. I cam across your site while doing some research for an article I was writing and was captivated by the whole idea. So much so that I’ve decided to start my own bullet journal in an attempt to make my life a little more organised. I lan to write a blog post for my website 4everwritingonline.com and would like to feature a link to your site. Would this be possible?
Absolutely, it would be fantastic if you featured our site!
Good luck with your bullet journal!
Thanks so much for the advice! I just started my first bullet journal and I have found several ideas from your site that I’ve already incorporated, with several other tabs open to check out some of your other posts. 🙂
We are so happy to hear that Kassi! Enjoy the new journey!
Perhaps this is a silly question, but it seems that most bullet journals have dotted pages rather than lined pages. Is there any particular reason for this, and if not, will lined pages work as well (i.e. a school book that can be bought almost anywhere)?
Great question Derek! The dot grid pages make it easy to still write in “lines” but you can still create all kinds of layouts quite easily as well. Vertical lines are a cinch to line up with the dots but lined pages make it a bit more time consuming. Lined pages are still totally doable though!
I use lined paper and it works just fine. If it bleeds, skip pages and fill up you’re notebook (which was my intention in the first place)
I’m a perfectionist so at first it was so SO hard to come to terms with the fact that my journal wasn’t and shouldn’t be perfect.
Honestly now that’s one of the things I love the most about it. It’s got my sloppy notes from when I forget my class notebooks and would temporarily store notes in my journal and my gorgeous planning pages from when I spent an hour just doing a corner detail.
It’s grown with me and morphed as my needs changed. When I started it I was still in school so I have full pages dedicated to a days to do list/homework list and reminders. Now I work full time and my job is more routine so a week spread for notes and reminders is more helpful.
<3
I love that you’ve continued to change your journal to fit your needs. Isn’t it wonderful that it can continue to evolve with you?
Thank you for this fantastic post. I stumbled across it as I searched for “watercolors in my planner” or something like that. I’m not very talented when it comes to painting (I’m more of a photographer) but I LOVE color and I want to learn more about watercolors how to put more color into my very simple bullet journal type planner. Your explanation and cheat sheet are very helpful. I think what makes your blog post stand out the most is how you explain how “some folks do it”, how the “official version” is done, and then you talk about how you do it. It’s basically – you take what you want and leave what you don’t need. It’s quite freeing. Thank you again. I’ll be visiting your page more often. I also must compliment your beautiful colors. Those paints that you use are stunning and have brilliant color saturation.
What a wonderful compliment Leilani! You’re right, it truly is freeing to be able to do what works best for us and not have to follow any rules but our own.
This is such a helpful and thorough explanation, Shelby! Thank you for putting it together! I’m linking to this article in my bullet journaling blog post this week so my readers can see your (much better) explanation! 🙂
Thanks so much Emma! It’s great to hear the explanations were helpful for you ?
Oh thank you for this! It’s all helpful but especially “your bullet journal isn’t helping you if you aren’t using it.” about first page fear – i’ve literally been putting off getting started for SOO long due to being scared of not being happy with how it turns out. But I think that sentence (along with other helpful tips, obvs) really was what pushed me to actually put pen to paper and start!
That makes my socks roll up and down, D! I’m so glad you found it helpful! Hopefully, now that you’ve started, those fears won’t be bothering you anymore 🙂 You’ve overcome the hardest part!
Hi, I am a total newbie to this concept but not to journaling. At least how it was done in the past with a simple moleskin notebook! Your resource here is a wonderful ‘roadmap’ for a newb getting started and discovering this medium again!
Thanks so much for showing us the way and this is will a reference for some time to come. Oh, and yes I did break the guy code and did ASK for directions, BTW! 🙂 Glad i found your blog! – charlie c 🙂
Glad to hear this is helpful Charlie. Never hurts to stop and ask for directions, right? 😉
What watercolor set do you use?? I love it!
Thanks so much Cassandra! There are a few different ones used throughout the post. Here is another post that lists them out in more detail: https://littlecoffeefox.com/best-watercolor-supplies-beginners-need-start/
This is amazing!
As someone who suffers ADHD organisational planners have not helped as I hate being restricted in what I do, I have just started my first bullet journal and am loving it!!
This article was so very helpful that once I am more comfortable with my bullet journal I can start to spread my wings and try new things.
I love hearing this Kayleigh! The freedom of bullet journaling is really incredible.
I love how chill everyone is about bullet journaling. It’s sort of like we’ve all been burned out on the “wrong way” of doing things in the past and going too hard too soon. I like your idea that it essentially boils down to a pen & a notebook. Whatever you do from there is up to you although here’s some ideas, rather than “this is how you do it and if you miss a day you may as well not do it anymore” which is how I think we’ve all felt before.
I know the post is a little old now but thanks! It’s just what I was looking for as I start my journal.
Yes, Matt! That’s the beauty of bullet journaling – you can make it whatever you want it to be and it can be totally flexible.
Hi,
Thank you for the helpful post! I am somewhat new to bullet journaling. I have a question… what do you do with the blank pages before spreads? Every time I start a new monthly or weekly spread, I seem to have a blank page before it. I don’t want to end up with a bunch of empty pages throughout my journal and I don’t have enough collections to go back and fill them all up
Hi Melissa! I personally don’t skip any pages or have any empty ones. I pretty much fill up the front and back of 95% of the pages in my bullet journal! Occasionally, I’ll need to make a spread with two pages and it will work out that an empty page will go before it, but usually, I end up going back and using that page for scratch notes or doodles. I hope that helps!
Thank you soooo much! this has given me a great start to my bullet journal!
It’s so great to hear this has helped you get a start with your journal Lelani!
AHHHMAZING. I love your bullet journal pages – you are an amazing artist! I am brand new to bujo, just googling sites for ideas and came across yours. Mine will definitely be MUCH simpler just starting out, but I am now a follower of yours – looking forward to reading through your blog. 🙂
Welcome, Lisa! You will be amazed at how much you learn and grow as time passes.
Excellent! I started bullet journaling today, and have been researching many different ideas, and I find I keep coming back to your page 🙂
One burning question that my OCD tendancies (lol) can’t handle…. your recipe page……howwwww do you possibly fit recipe instructions on a small post it?
I don’t! I just make sure to write down the ingredients and the exact name of the recipe so I can look it up again later. My goal is to get all the ingredients listed so I can grab them from the store. Then when I’m cooking, I can look up the instructions. I get all my recipes online, so as long as I get the keywords correct, I can almost always find the recipe again. Though now that I think about it, I really ought to write down the site that the recipe is from as well. I hope that helps, Christina!
Yes, thank you!
I love this! I just hope you mention more affordable supplies for beginners in bullet journal. I started my bullet journal this year using only very cheap products and it still works great! Love your bullet journal by the way ❤️
I’m glad you liked it Kyla! As I mentioned in the supplies section of the post, any supplies will do – even cheap or basically free supplies! I don’t believe that you should go out and buy expensive stuff to get started. But I know that once I invested in slightly nicer things, I felt 10x more invested and excited to bullet journal. In the end, you should do what makes you feel good about bullet journaling AND what makes you feel good about your wallet. It’s all about striking a balance.
I’ve just started my first bullet journal, and am so thankful for your site as a resource! Thank you so much 🙂
x Jamie @ Glow On
So glad to hear! Thank you for being here, Jamie!
Thank you so much, Shelby! I have also followed you for over a year now and love the little tidbits you give us. I tend to run low on inspiration for doing artistic/creative spreads but am a great copy-cat so I really like that you provide examples of what you’ve done and demo’s of your spreads. Thanks for being awesome and putting all of this into one place!!
Thanks so much for being a faithful reader, Cat! Glad to hear it’s been helpful for you.
Could you give some advice? you have an task on your monthly log eg ‘pay taxes’. When you create your weekly for the date in question it goes in the weekly log. At this point does the task get migrated off the monthly log, or does it exist simultaneously on the weekly and monthly log till completed?
That’s a really great question, Jo! I personally keep them both simultaneously. So the task exists in the monthly log and then gets rewritten in my weekly log. Only when the task is complete do I mark it off the monthly log! I keep the monthly log as more of a reminder rather than an active task list, and all my active to-dos live in a weekly or daily. I hope that helps!
Thank you for this post, Shelby! I have been following your blog for a year now and bujoing for 1,5 yrs now in my 3rd journal and I still needed this post! Thank you so much for opening yourself and inspiring us 🙂
It’s so great to hear you’ve been inspired, Meelike!
Loved this post. I’m still refining my first bullet journal and while I don’t mind having my collections in the middle of things, it does make them a little less easy to find that some things, so I like the idea of starting from the back (when I’m writing I put the Table of contents in the back and work my way there, starting with necessary lists.). As I’m getting close to the end of my first journal I’m starting to explore a lot more of what is possible.
That is really one of the wonderful things about journaling, isn’t it Kitsa! You can change it however you would like, to fit what you need.
How would you recommend indexing collections when you start from the back of the journal?
You have such lovely pages.
That’s a great question, Dani! I would suggest you perhaps have two columns in your index, like the one in this post: https://littlecoffeefox.com/10-bullet-journal-hacks/
I hope that helps!
Good morning, Shelby. I’ve never come across such a comprehensive depiction of the Bullet Journal as what you have written here. Love it. Is it possible to print this out?
Wow, thank you for the compliment Beverly! You should be able to print the pages with with the “print page” function on your computer, or by highlighting, copying and pasting the text into something like a Word document which you could then print.
I so want to use water colors in my Leuchtturm1917, but after a bad bleed thru when I stamped something, I’ve been hesitant. I’ve seen your post using a different book- but yet see examples for what looks like in the Leuchtturm… what advice do you give about that? Thanks
That’s a good question, Charlene! In this post, you sometimes see pictures of a Rhodia or a Moleskine watercolor sketchbook. But when it comes to watercolors in your Leuchtturm, you should be good to go! I had that same problem once when I tried stamping something, but that’s because ink and watercolor behave differently. Ink from an ink pad is too juicy or its alcohol based (I’m not positive which), and that makes it bleed through the page. Watercolor will absorb slightly into the page or sit on top of it unless you put down loads of paint. If you want to see a comprehensive test of watercolors in a Leuchtturm, head to this post (https://littlecoffeefox.com/leuchtturm1917-vs-moleskine-bullet-journal-watercolor-test/ ). I hope that helps!
Wow, you hit on so many things I wonder about, can’t decide about. I really am grateful for the talk of additional journals, and since I recently bought some of dot and some other planners, that the pages move, I’m thrilled.
I think I am signed up or you would not be finding my email, so I’ll check on that, but thanks for this one, and keep it up!!!
Marylou Trop
I’m so glad it was helpful for you Marylou! I believe we addressed your email about the password but if not, please do let us know so we can get it taken care of for you.