
Watercolor Washes: 4 Basic Techniques You Need to Know
Articles may contain affiliate links.

What Is A Watercolor Wash?
This is a free sample from my course, Watercolor Washes: 5 Essential Building Blocks For Watercolor Painting, on Foxsy.com. With a Foxsy membership, you can access this course along with 24 others on subjects such as watercoloring, creative journaling, hand lettering, drawing, and so much more. Take the first step toward making 2023 your year of creativity!
Build Your Foundation
When you first begin watercoloring, you will probably focus a lot on the materials first. You think about what paints and paper and brushes you need. Materials are important, but when it comes time to actually put brush to paper, then you need to focus on technique. You need to master the basics, and watercolor washes are priority number one. Nearly all of watercoloring is based on this foundational knowledge. But fear not! In this tutorial, I show you the essential concepts and a few tips to help you conquer watercolour washes quickly and easily.

What is a Watercolor Wash?
A watercolor wash refers to a layer of color that is somewhat transparent applied with a diluted paint mixture. Typically, washes are applied over a large area of a painting to help create backgrounds or build layers of color. Since watercolor relies heavily on the ability to build layers of paint, washes are vitally important to learn.
New to Watercoloring?
If you're new to watercoloring, I highly recommend that you check out my watercolor guide for beginners. This massive free guide includes absolutely everything you need to get started watercoloring.
Even if you're not new to watercoloring, I guarantee you'll find some stuff you love.
Watercolor Wash Materials
Here are all of the materials that I used to create my watercolor washes!
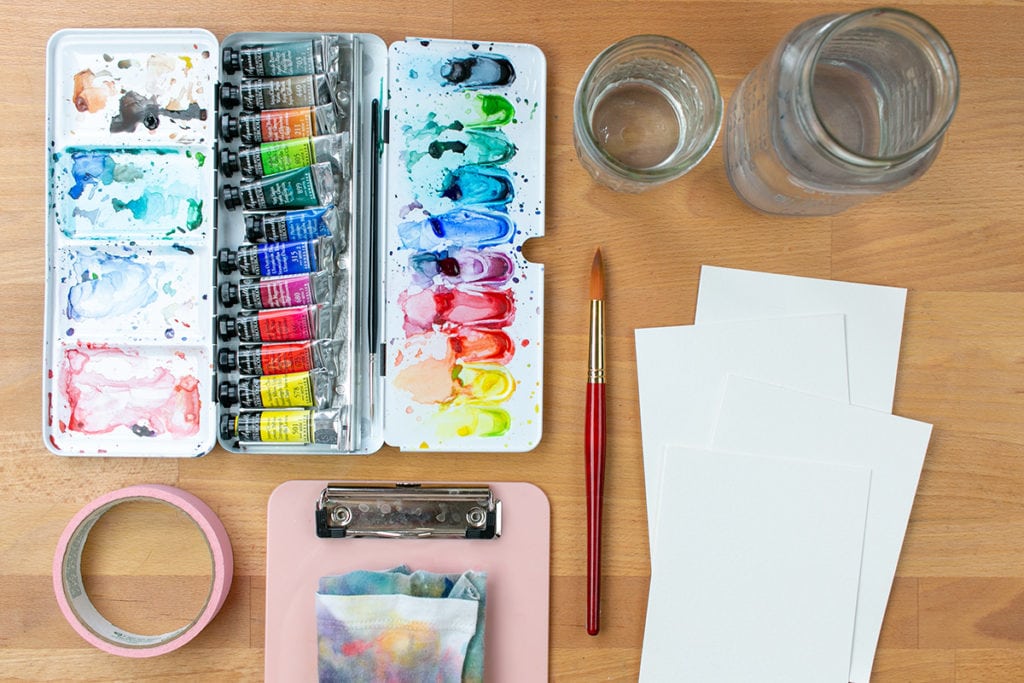
Sennelier Watercolors
You certainly don’t need such high-grade watercolors to create washes. These are just my favorites! You can see more inexpensive paint options here, and check out my Sennelier review here.
Canson Watercolor Paper
For washes, you will want a decent watercolor paper. This affordable 140lb watercolor paper is perfect for the job.
Grumbacher 14 Round Paintbrush
You don’t need any particular brand of paintbrush to create watercolor washes. However, you should get a large round, flat, or mop brush. You want it to be big so you can cover more area with your brushstrokes.
Board
It’s best to have some kind of clipboard or artboard to work on. You want to be able to pick up and tilt your painting as you work. Working on an artboard also means that the mess is easier to contain and clean up.
Masking Tape
Use masking tape to secure your dry paper to the board and create a clean edge around your wash.
Two Jars of Water
You need two jars while you work — one for cleaning off your brush and another for adding clean water to your painting. If you just use one jar for everything, you will end up frustrated with muddy paintings.
Rags
Get something to clean off your brush while you work. I use scraps from an old Tshirt, but a paper towel will also work.
4 Basic Watercolor Washes
There are four basic ways to create watercolor washes in your paintings. Each technique requires some practice to nail timing and control, but none of them are particularly hard. In fact, practicing all of these watercolor washes can be very enjoyable and relaxing.
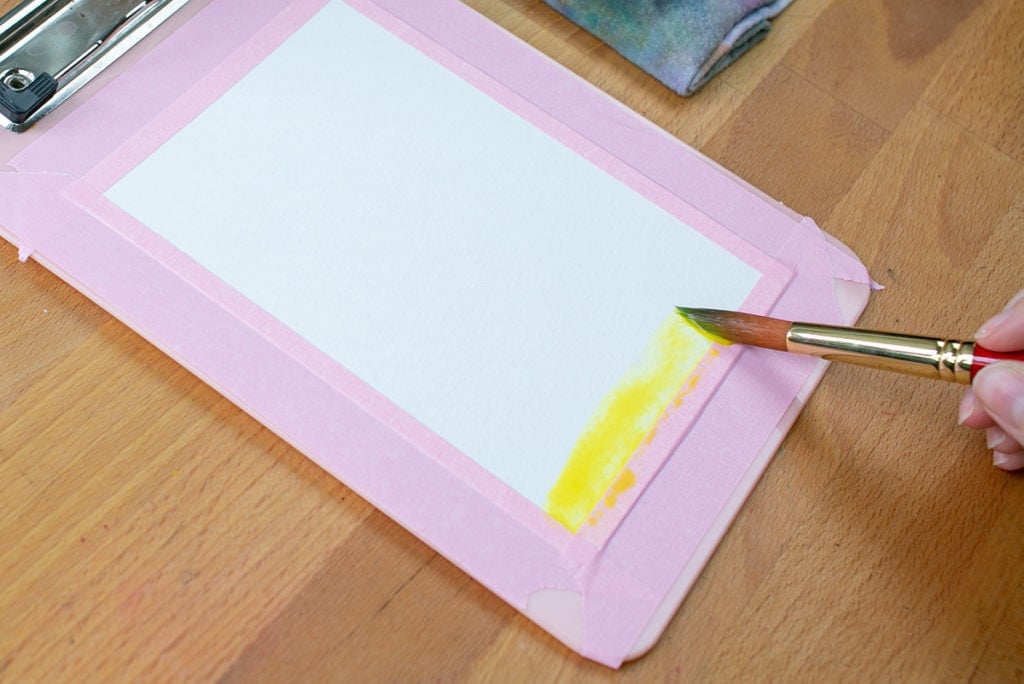
The first thing I like to do before beginning any watercolor piece is taping my paper down to a board of some kind using masking tape. This helps me focus on the watercolour painting itself, so I don’t have to worry about the paper shifting. This is an entirely optional step, but I would highly recommend you do the same before you take a stab at any of these washes.
#1 Flat Wash
The aim with a flat wash is to create an even layer of color all the way through the entire wash. This can be a bit tricky because watercolors dry quickly. If you are too slow and the edge of your brush stroke dries, you can end up with a hard line that you don’t want in your painting. The trick is to move quickly and have the right amount of water and paint on your brush. Your brush should be completely wet, but not dripping. One tip that will help is to wet your paintbrush with clean water before you dip it in paint. There are two ways to go about a flat wash, and each produces slightly different results.
Dry Flat Wash
A dry flat wash is simply a flat wash done on dry watercolor paper.

Load up your paintbrush with your paint. At the top of your paper, lay down your brush and create wide, sweeping horizontal strokes. When the paint begins to lighten, lift your brush. You should see a small bead of collected paint sitting at the edge of your last stroke. Making sure your brush is sufficiently wet and loaded with paint again, begin making more sweeping strokes starting at that bead. Continue this until you get to the bottom of the paper.
You might notice some paint pooling around the edges of your tape. These small pools will dry and create a darker line at the edge of your painting, so you need to remove them. Simply clean your brush and wipe it dry on your rag. Then touch the pooled paint with the damp brush. Your brush should absorb the excess paint easily. If your flat wash looks a bit streaky or uneven, feel free to wet your brush and go over it again, starting at the top and working your way to the bottom. This should smooth out some of the uneven patches.

Wet Flat Wash
A wet flat wash is the same as a dry flat wash except that you wet your watercolor paper.
First, take your completely clean brush and load it with fresh water. Liberally wet your paper until it is shiny, but not so wet that water will run off the paper. Then perform a flat wash exactly like the dry flat wash. Load your brush, start from the top, and gradually work your way down with horizontal strokes. Because the paper is wet, you won’t need to hurry quite as much because your paint will take longer to dry. The final effect will appear a bit softer and more ethereal than a dry flat wash.

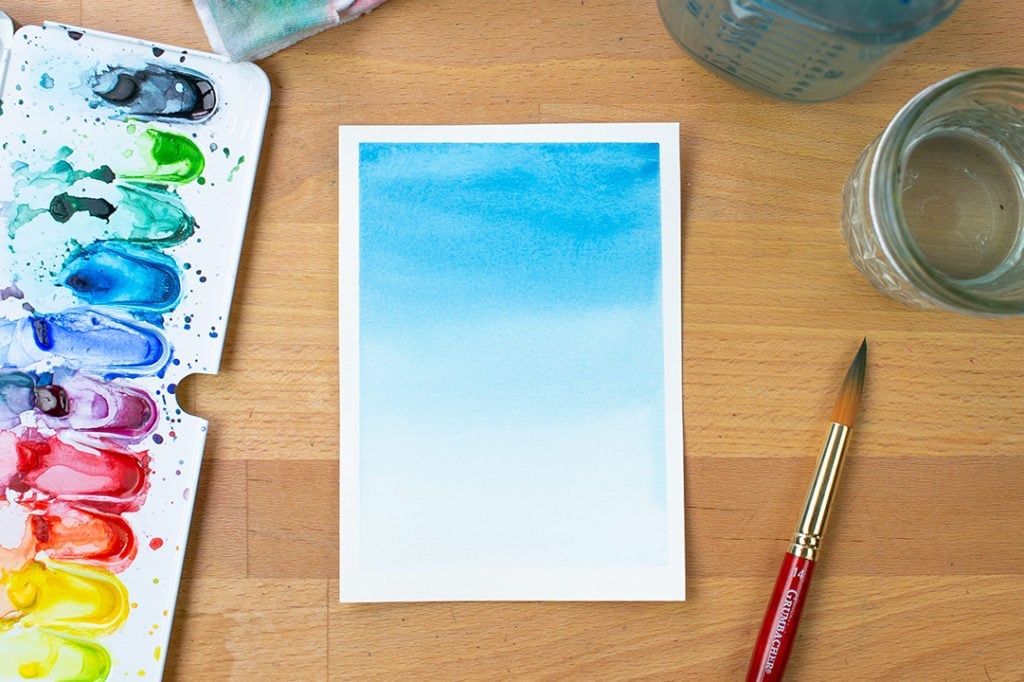
#2 Gradient Wash
The goal with a gradient wash is to slowly fade the color out until it is entirely transparent. You start with full color on one end and dilute it until the paint is nearly or fully gone.
Just like the flat wash, you want to use broad horizontal brushstrokes and move down the paper. Start at the top of your paper with a fully loaded brush and apply a few brushstrokes. Then, working quickly, dip your brush into your cleaning jar of water. You don’t need to get it fully clean of paint, but make sure it is diluted. Dip your brush into your clean jar of water and brush along your last stroke, making sure to overlap slightly. The more concentrated paint on the page should gravitate toward the new watery brush strokes. Again, clean your brush off a bit more and wet your paintbrush with clean water. Create more overlapping horizontal strokes until you reach the bottom of the paper. By the time you reach the bottom, your paintbrush should be completely clean of paint and only be applying water.

If the gradient isn’t gradual enough, you can go back and add a bit more pigment to the top of the paper and work down in the same method. As long as the paint doesn’t completely dry, you can continue to rework it and smooth out the transition until you are satisfied.
You can reverse these steps to get a gradient watercolor wash. Starting with clean water and slowly adding more pigment is an option, but I find it a bit harder than starting with the boldest part of the paint. I would recommend you try your gradient using the steps I suggested first. Then try starting with water and working toward bolder color. Perhaps you will find you prefer doing this watercolor wash a little differently!
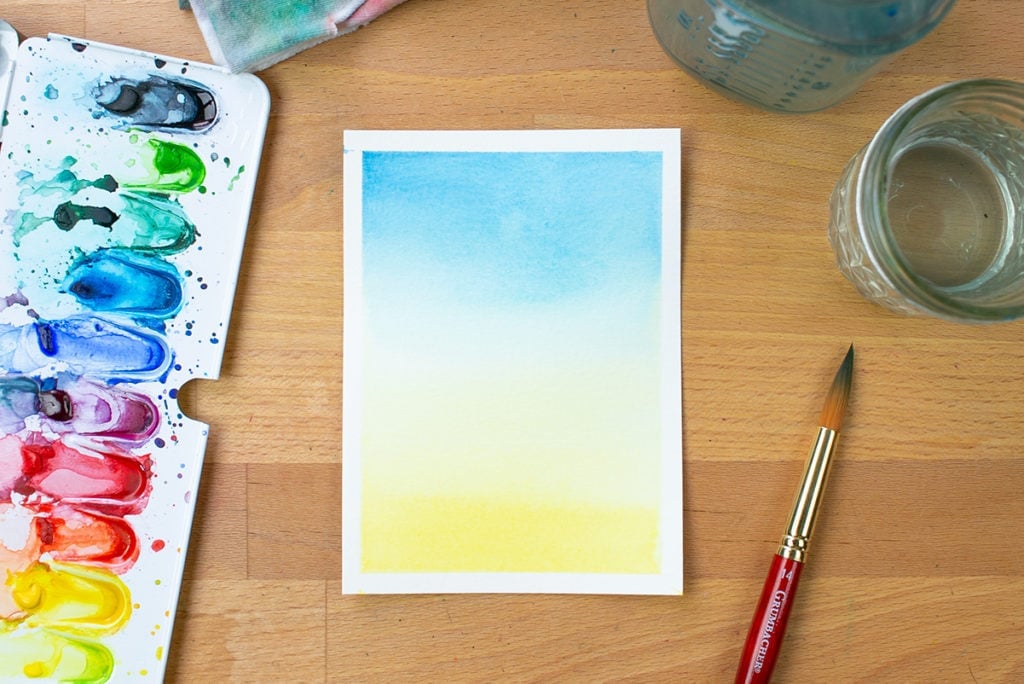
#3 Variegated Wash
A variegated wash is very similar to a gradient wash. However, instead of diluting your color into complete transparency, a variegated wash aims to blend two colors smoothly from one into the other. Before you begin, make sure you prepare your two colors by evenly wetting them. Remember that the key to watercolor washes is working quickly, and nothing will hold you up like trying to activate a dry blob of paint.
As you probably guessed, this technique works best with wide horizontal brush strokes. Load up your brush with your first color and begin at the bottom of the paper. Just like the gradient, you want to dilute your paint as you work up the page. By the time you reach the top of the page, you should have a clean brush. Then quickly clean off your brush in your dirty water jar, wet it in your clean jar, and load up with your second color. The paint on the paper should still be wet and workable.

Begin applying brushstrokes with the concentrated second color at the top of the page. Work your way down, diluting it as you go. When you get to the middle of the page, your color should be very diluted for both colors. While the paint is still wet, use your brush to push color up or down until the transition seems smooth. It takes a few tries to get the colors blending nicely, but you should be able to achieve a smooth transition between the two colors. If you can’t quite get it on your first try, then don’t worry! This watercolor wash takes a bit of trial and error to figure it out.

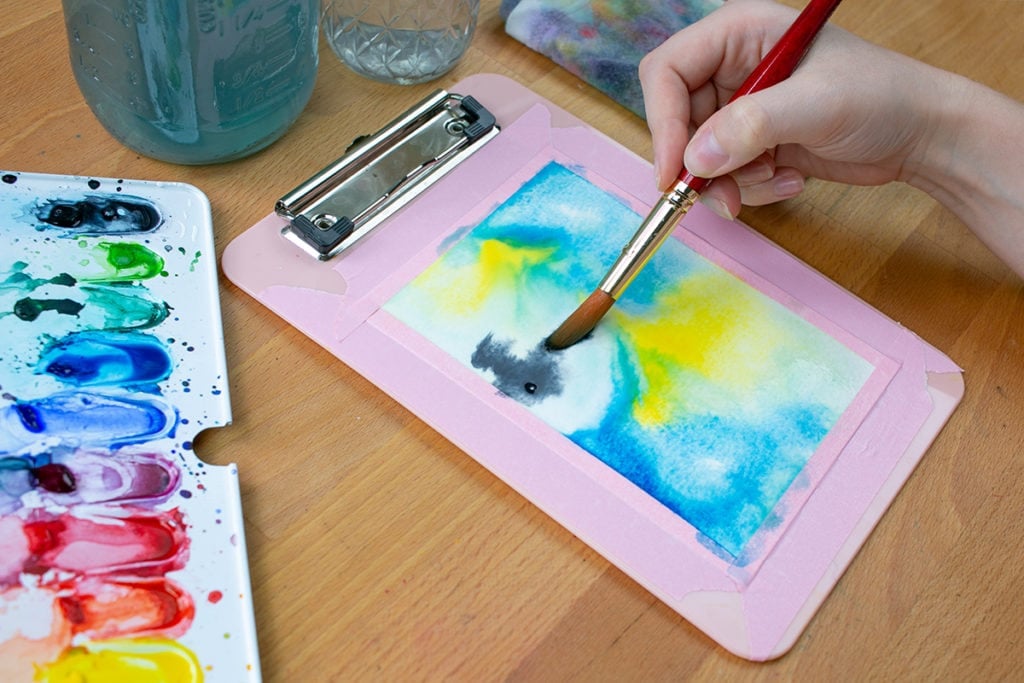
4# Wet on Wet Watercolor Wash
The last watercolor wash technique you need to know is the wet on wet wash. This technique is one of the easiest and most fun to create. You can let loose, play around with colors, and create something wholly unique and unexpected every time.
First, you need to wet your paper with clean water. Your paper should be shiny, but not so wet that water can run off the paper. Load up your brush with a color and touch it to the wet paper. The color will bloom out and begin to spread. Add more of the same color to your painting or start incorporating new colors.

Take care to add paint to all areas of the painting so that no white remains. You can add more water with your brush if you want to dilute a strong color or add more pigment if you want your wash to be bolder. Use your brush to pull colors into each other or push them around to your liking. If you like, you can even pick up the board your paper is taped to and tilt it, causing the paint to flow in different directions.
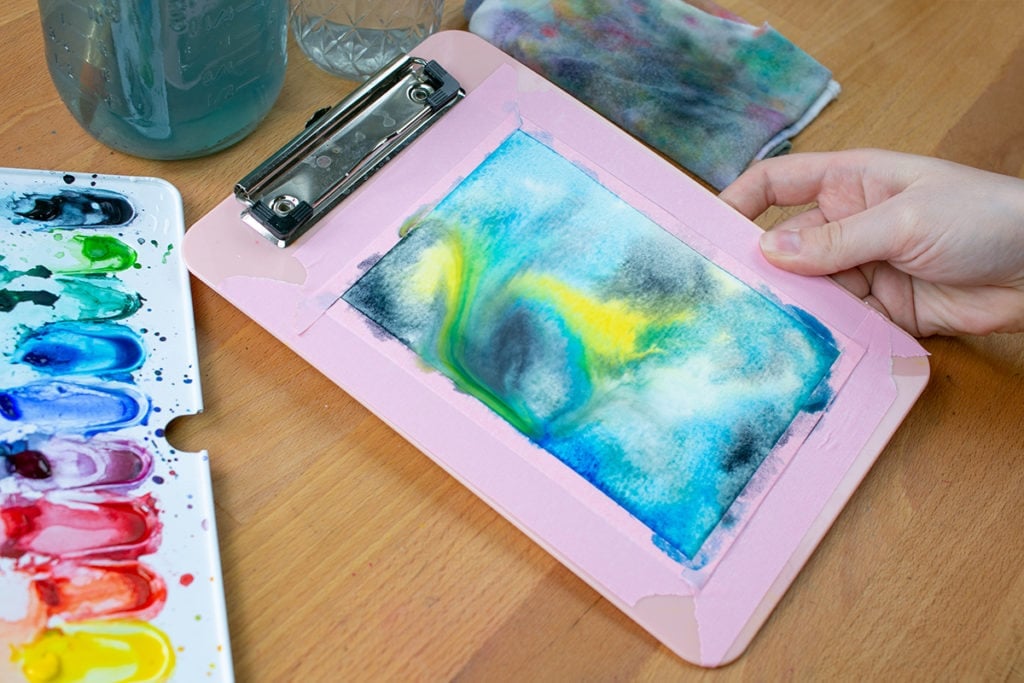
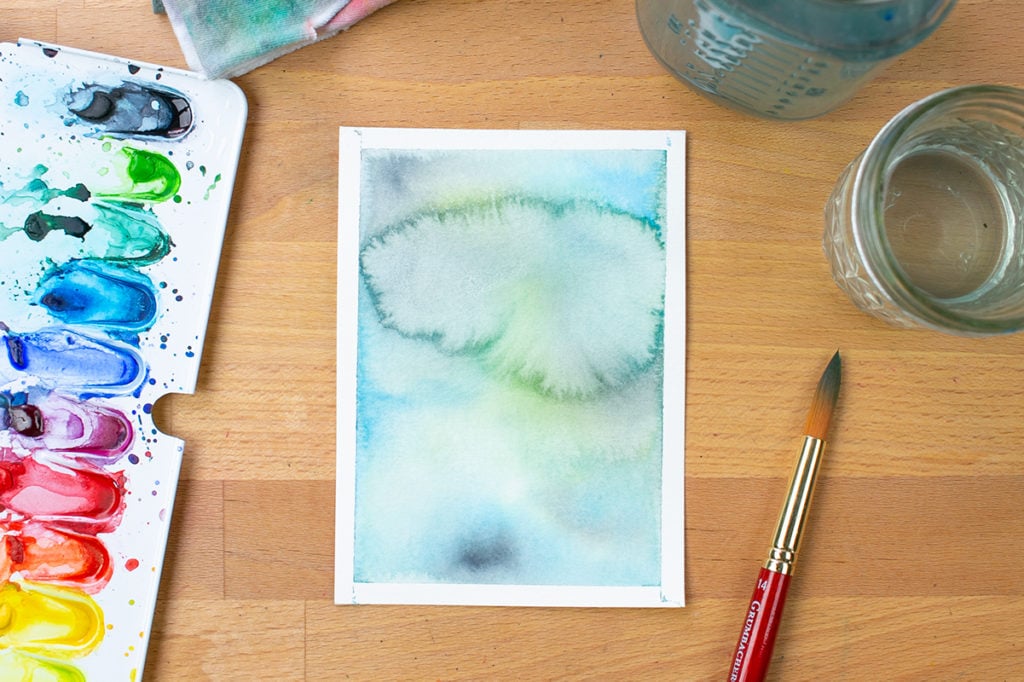
Once you are satisfied with your watercolor wash, you can set it down and let it dry. Take care to mop up any pools of paint, or they may dry in unexpected patterns. I forgot to check for pooling paint with this wash, and it resulted in a patch of uneven color. However, you might desire this kind of effect. Watercolor is desirable for these unique patterns, so you can purposefully let it dry in these interesting formations to add dimension to your final work.
Layer it Up
You may find as you begin playing with watercolor washes that it is hard to get a perfectly smooth wash. There will be dark spots, light spots, streaking, and hard edges. Embrace these imperfections. Watercolor is a wild medium, and you can’t expect to tightly control it. Water will flow where it wants to flow, and no matter how hard you try, you won’t be able to completely bend it to your will. Learn to roll with these imperfections and not fight them, and you will have a much better time with this medium.

Washes may seem so basic that they aren’t worth your time, but that couldn’t be further from the truth. Mastering washes can unlock techniques and styles that you didn’t know you could do. Layering up multiple layers of paint can create some of the most beautiful paintings. Yes, applying wash upon wash may take time, but your patience and effort will pay off. Practice watercolor washes with all of your favorite colors and keep trying. With a little bit of trial and error, you will quickly get a grasp on washes and be one step closer to creating your watercolor style.
Explore More Art Tutorials
If you want to learn more about washes and how to use them, then you’d definitely love my course Watercolor Washes: 5 Essential Building Blocks for Watercolor Painting on Foxsy!
Watercolor Washes is the perfect class to help you understand the ins and outs of 5 different washes, including a wash not featured here! You’ll see a few different ways to approach these techniques, as well as 5 projects to help you cement in your new skills.
And with a Foxsy membership, you also gain access to the growing creative course library! Foxsy is packed with art classes to help you grow your watercolor, lettering, drawing, and creative journaling skills — and more classes are added every month.
Take the next step on your creative journey and get your Foxsy membership today!


I had a rather silly question: How does one choose the right colors for a background wash?
That’s not silly at all, Sharmila! However, there isn’t really one good answer. I like to go off of what I’m trying to achieve with the whole piece. Do I want it to feel warm and bright or dark and moody? Do I want to have contrasting colors, muted earthy colors, or bright neon colors? A wash is an excellent base for the rest of your piece, so whatever color you choose will affect the rest of the painting.
I’d say experiment with whatever colors you feel happy about. Try a medium to light wash first (not something super thick and opaque) in your favorite color. Then try different colors from there, either on a new piece or layered on top of the first wash. After you do it a few times, you’ll figure out what colors work well for your style and what colors didn’t quite gel for you. I hope that helps! Whatever you do, don’t worry too much about messing up. You have to try things you aren’t sure about to discover what you love best, so make a mess and have fun!
wow
I have been painting watercolor for 5 years
each time I attempt wash it is totally different.
feel so grateful to read your mini blog post.
so informative.
while participating in a challenge i read “wash”
a little confused if my entry will be okay? i found this.
love your written expression and presentation.
keep it up.
sending you a little love here with a grateful heart
I’m so glad you enjoyed the post, Reen! I love how washes never turn out the exact same twice. They’re always so unique!
Olá! Falo de Portugal, gostei muito do seu post. Obrigada por partilhar os seus conhecimentos com o mundo! Bjinhos
It’s my pleasure, Ana! I’m glad you enjoyed the post! ?
I loved this description.. very clear and encouraging. I was reading about how there are still lots of places that have minimal internet, or their networks are loaded and spotty right now… I am so impressed that you take the time to give use the typed instructions instead of just saying… Watch my video. Especially now when not everyone can do that. Great job.. Thank you!
Judy
I’m so glad you enjoyed the post, Judy! I hope you have fun creating some beautiful watercolor washes ?
I enjoyed reading the watercolor article. Thank you.
I enjoyed this post, looking forward to getting into watercolor!
I’m so glad you liked it, Natasia! I’m sure you’ll have a ton of fun with watercolor ?
Wet flat wash and variegated wash techniques is new for me. Thanks for new techniques for watercolor washes.
I’m glad I helped you find some new techniques! 🙂