11 Bullet Journal Hacks & Tricks to Take Your Planning to the Next Level
Articles may contain affiliate links.


Bullet Journal Hacks & Tricks – What’s More Fun?
There are so many little tips and tricks for creating and improving your bullet journal, but how do you know which ones are for you? Well, I have collected 11 bullet journal hacks that I know to be super easy and crazy effective! None of these hacks should take more than five minutes, so they really are the epitome of simplicity. So why don’t we jump in?
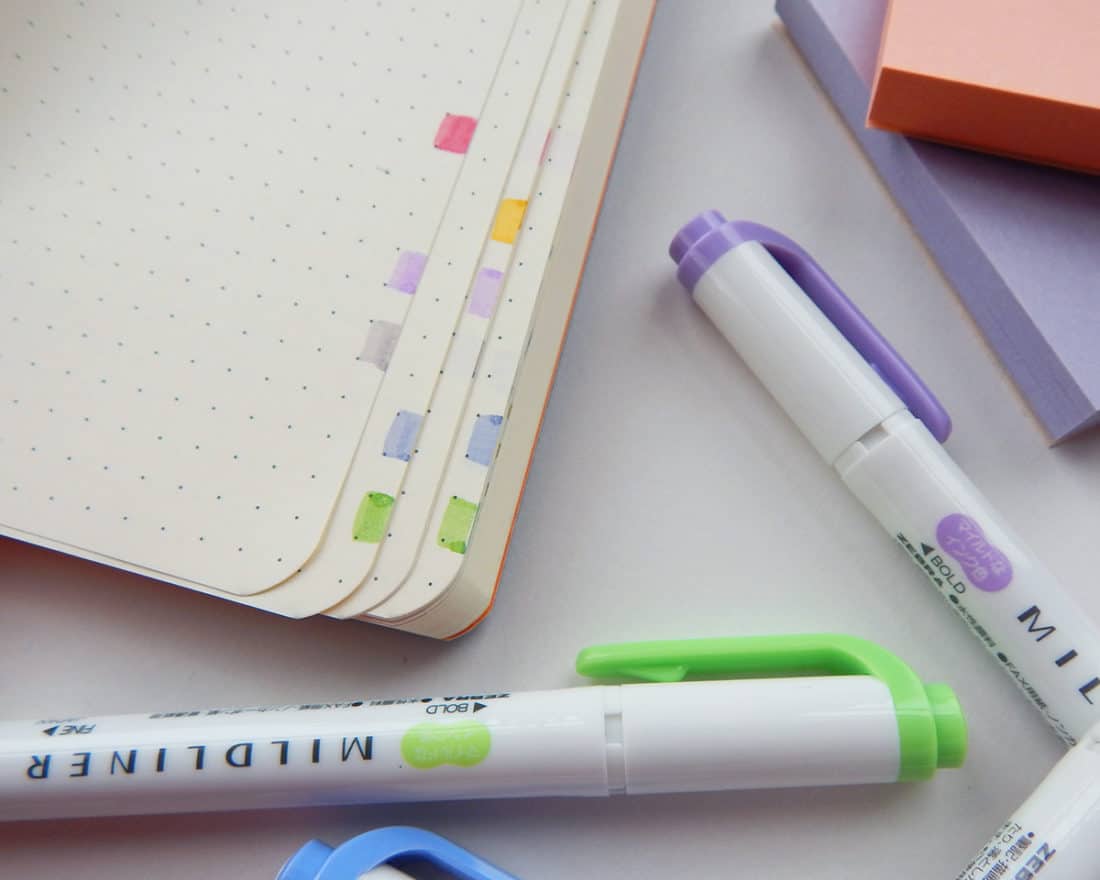
#1 – Color Code With Mildliners
This is an easy bullet journal idea to help you organize the categories of your life. Create some type of color coding system with the help of the lovely Zebra Mildliners and start marking your pages with a simple color square! Do it right up to the edge of the page and you can see the patterns of colors that make all the difference, building up as you go.
#2 – Color Code Your Bullet Journal Index to Match
If you want to take your color coding to the next level, add it to bullet journals’ indexes! Create some type of system (pink is monthlies, yellow is notes, etc) and start highlighting your bullet journal index to match the pages. That will make it all the easier to search for your collections and plans and cut down on chaos!

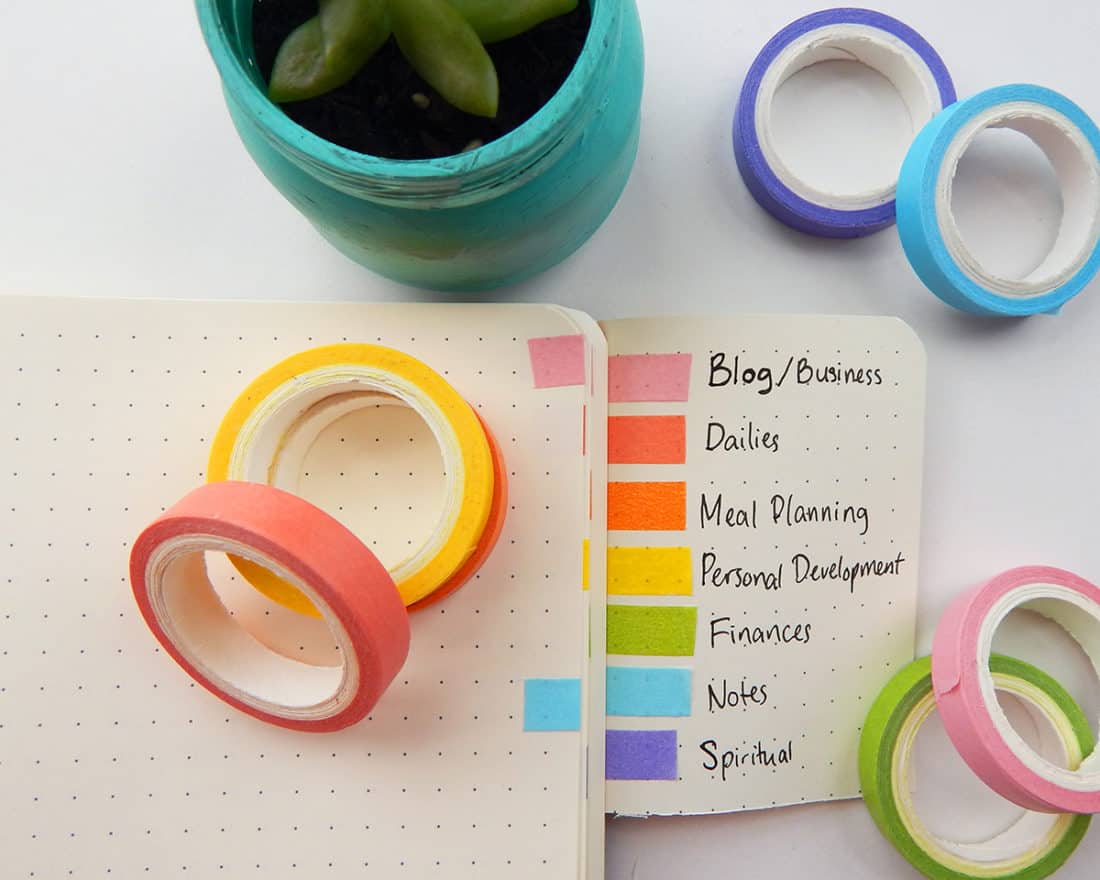
#3 – Color Code with Washi
Want something a little bolder than highlighters? Go with this rainbow washi set! You only need a little bit of tape to bend over the edge of the page to get a cute and prominent page marker!

#4 – Make a Fold-Out Bullet Journal Key
Whether you are wanting an icon key or a color coding key, this is one of those bullet journal hackss that will get the job done. I simply tape this little piece of paper in the back of my bullet journal so I can easily fold it out. And what’s better, it matches the placement of my washi color coding so I can see exactly where to place my tape!
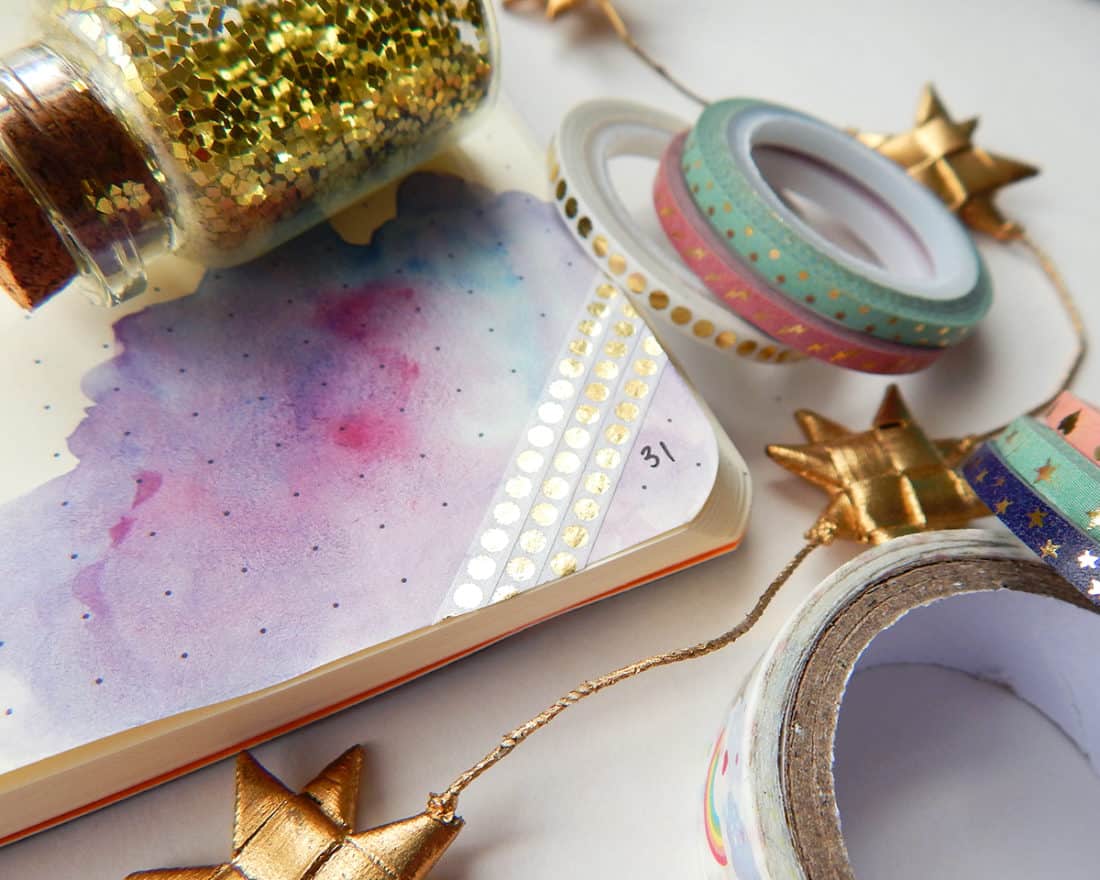
#5 – Mark Special Collections with Special Washi
If you are working on some type of long-term projects like wedding planning or a term paper, this hack is for you. For each page that features important notes, lists, or plans about your big project, just mark the corner of the page with some fancy washi. Use the same fancy washi throughout so you can quickly identify your project. You can grab this set of thin washi here, or check out this Etsy shop for a ton of cute options!
#6 – Go Dutch
This is one of those bullet journal tricks that looks super weird and complicated, but it’s actually really a super simple hack! It’s perfect for people who want to add more trackers or logs to their weekly spreads but don’t have the room, because every bullet journal needs a habit tracker! Just create a dutch door. Use a craft knife or go carefully with scissors to cut a panel out of one page to create this cool effect. Then you can increase room and optimize your planning in your habit tracker. Cool, right?
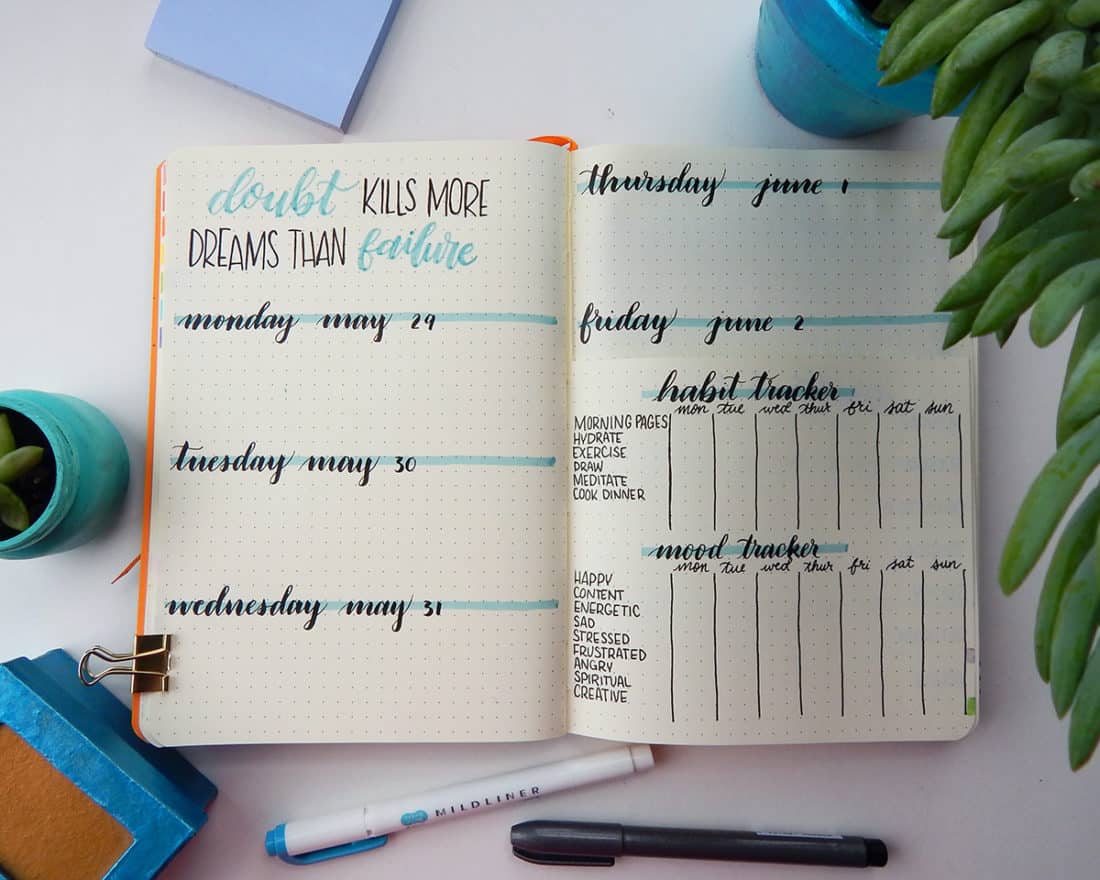
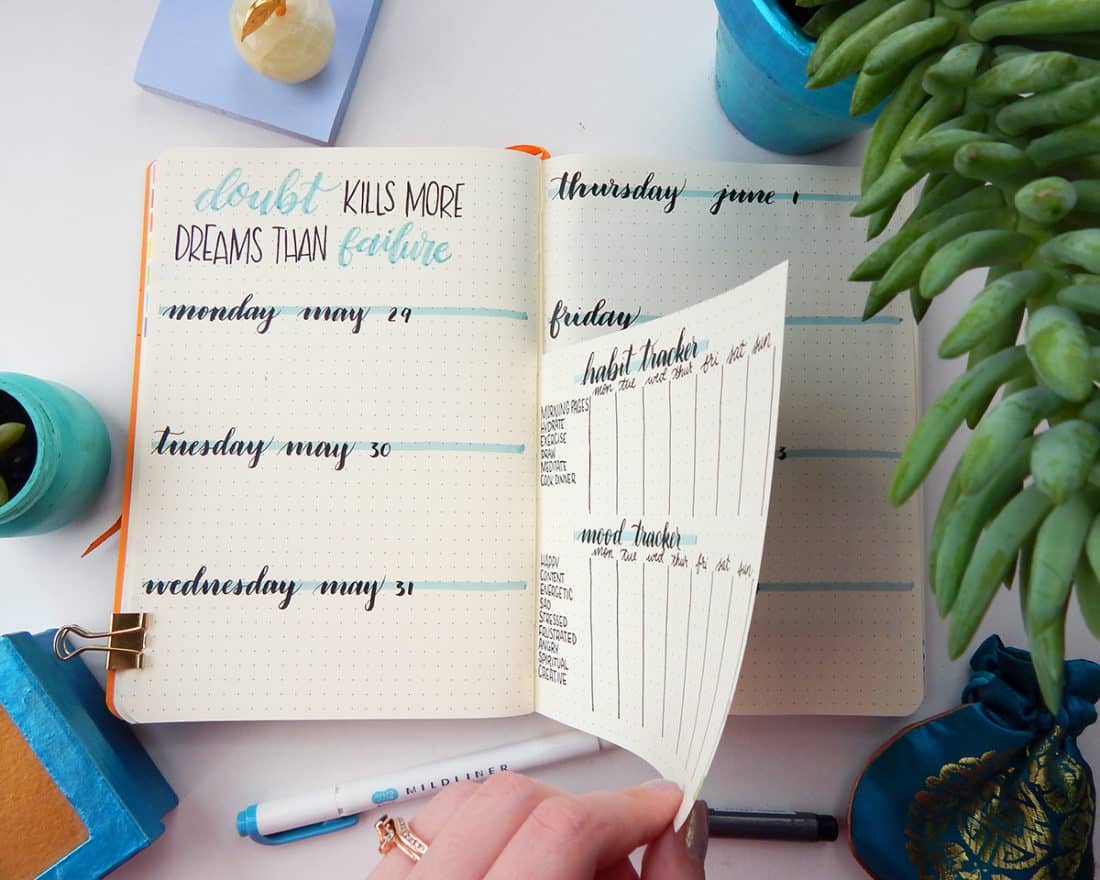
Look at all the room for activities!

#7 – Categorize Your Bullet Journal’s Index
Another way you can hack your index is by breaking it down into categories. Draw four columns across the spread and simply keep things separate. If you’re afraid of running out of room, reserve the next spread for an index too! And if you are using color coding, you could use your Mildliners to give each header its own special color.

#8 – Wrap the Strap
I first saw this technique in Page Flutter’s bullet journal hacks post, and it is so elegantly simple! Just pull the bottom of the elastic band on your Rhodiarama (or Leuchtturm, or Moleskine, or whatever) journal and wrap it around the bottom left corner. That gives you a diagonal strap that you can hook pens onto for journaling on the go.

#9 – Keep a Store of Post It Notes
I started doing this months ago without even considering that it might help anyone else. Whoopsie! All you do is layer Post It notes on a back page of your journal so you can keep them with you on the go. I especially like this bullet journaling hack for meetings so I can jot down ideas for later with sticky notes.

#10 – Tape In a DIY Envelope
This is a great idea if you want to have some extra storage for special items like writing inspirational quotes, tickets, autumn leaves, or just about anything else. Your imagination is the limit! Use thin paper for the envelope and you should be golden. You can check out how to make DIY envelopes here. It’s easier than you’d think 😉
Once you have your envelope made, you can tape it into your bullet journal if you’d like to use thick washi tape or just use adhesive tape to create a more simple look. Either way, you’ll have a gorgeous little handmade pocket at your disposal. Isn’t that fun?

#11 – Write Down Your Why Statement
This simple bullet journal hack is a great candidate for the first page of your journal. What better way to kick off your own bullet journal than with a heaping scoop of motivation? Whittle down the basic reason that you want to do better in life – whether that’s to benefit another family member, get your dream job, or simply make good money to go on adventures. Then write it down to remind yourself why you are hustling and planning and organizing your life. It’s a great affirmation to add some bounce to your step!
If you want to make your Why Statement look extra gorgeous, why not try hand lettering? It’s one of those little things you can do to kick your bullet journal up ten notches, and it’s easy to learn!

Feeling Creative Yet?
It always amazes me how many ways you can bend the bullet journal to your will. There are just so many interesting ways you can add functionality to this little system! Hey, whatever helps me get my lazy butt in gear is a great thing.
What are some of your favorite bullet journal hacks? Tell me in the comments below!


This is lovely Shelby <3 I wonder do you have any advice for people who use pre-printed bullet journals? I struggled committing to drawing out all my own spreads and have taken to personalising the Go GIrl planner from Amazon
but sometimes struggle with motivation with this too D: I just want to be productive and organised!!
I understand completely! Organization can be tough to figure out, whether you use a pre-printed planner or a bullet journal. I have some tips in this post that you might find helpful!
Hi I just recently started reading your blog and subscribed to get emails and I must say that I am never disappointed. Whenever I’m feeling creatively stuck I can just read one of your posts and it brings on so many ideas. Thank you for having a well organized, appealing and informative blog.
Thanks a million Melissa! We are so happy to hear you find so much inspiration here.
Love all the creativity….and for me a new approach to dutch pages. Certainly going to try it.
I hope you enjoy Shelley!
Is the “look at all the room for activites!” a reference to the movie Step Brothers? Because if it is, I died laughing ??
That’s what popped into my head as well ?
This post is a game-changer! simply loved your ideas. Very simplistic and elegant.
I am a newbie bullet-journaler. I find your posts very inspiring!
That’s so wonderful to hear Kani! Have fun with this new journey that you’re on.
Your ideas are awesome. I’ve spent my summer really diving into bullet journaling and this one link gave me more good ideas than I’ve found anywhere else. Thanks!!!
It’s so great to hear these hacks were helpful for you Dana. Enjoy!
These are some of the best and simplest hacks I’ve seen. I really want some of those Zebra Mildliners.
I’m glad you’ve enjoyed them Cathy!
Lately, I’ve steered away from Bullet Journal Hack tips because they were all the same regurgitated ideas. Most fall into the “tracker” category. Sorry, but I don’t have three hours to track every single thing I do in a day.
Pleasantly surprised with these tips. These are actually useful and easily implemented. Tips 1, 2, 4, 7, and 9 are my favorites. I’ve seen the washi categorization, but don’t want to buy a whole bunch of tape and try to keep the rolls handy, so doing it with a highlighter is fabulous. I’ve seen the butterfly key before, but I didn’t care for it until now, just being able to mix it with the highlighter really popped out.
Add in a color-coded and organized index and I’m a happy camper.
Great tips that are truly hacks for a more organized use. Thank you!!!
It’s great to hear so many of these were helpful for you Diane!
I recently found your blog, and I’m obsessed! Very original hacks. Beautifully presented. Just enough text. Love it!
Thanks so much Kirsten!! It’s great to have you here ?
Wow. I just discovered your blog. I absolutely love it! <3 Thanks for so many tips , and I will be coming back again and again for more tips 🙂
So glad to have you here Soha!
I’m so in love with all your bullet journaling related posts. <3 They're so inspiring! Thanks so much for the great post. I'll get back to bullet journaling asap. 🙂
Thank you so much! I’m happy to hear you have found so much inspiration here.
I bought a very cheap A5 ringed notebook that had plasic dividers with pockets. They are actually split at the rings so that you can move them where you want. Because the notebooks were for my grandkids i ‘stole’ the dividers, trimmed them slightly and washi taped them unto my LT 😉
Sounds like a great “hack” that still gives them a journal and you some extra accessories!
Hi Shelby!
I love how clear and bright your pictures are. The foldout key is a brilliant idea!
Thank you for sharing these.
Thank you Jen! So glad you are enjoying them.
Love #7 for the index. Thanks for the idea!
Glad you like it Pam!
I started doing my monthly and weeklies from the back forward and the collections from the front backward. This way I have plenty of pages for them and can keep them all together.
That’s an awesome way to do it! Great idea, Jullie!
I currently use a Happy Planner system and really enjoy it, but I was wanting something for more flexibility to doodle and more bullet journal esque. Do you just have to guess how many pages a section is going to take since you can’t add pages to a book? This is where I get stumped.
These are great tips, thanks for sharing!
Well, that depends largely on what’s in the section! I take up about 22-25 pages for a full month of trackers, logs, weeklies, and misc notes. But that can vary wildly from person to person! My last bullet journal (with 249 pages) lasted almost exactly six months. I would say just go for it if you want to try a bound notebook. If you hate it, you can always switch back. Good luck, Sabrina! I hope that helps 🙂
Sabrina,
You might like a disc bound notebook like the Staples Arc or Levenger Circa systems. They take a little getting used to; you have to gently pull the page around the discs as you turn a page, but your reward is a notebook that can open like a spiral for writing and is easy to add and remove pages to. I prefer the Staples Arc system because the pages fit a bit tighter. Levenger made their page cutouts bigger to make page turning easier, but the result is a floppier notebook.
That’s intriguing. I’ve never seen the Arc system. Do the pages not fall out or get bent if you are moving them around? I love the different covers.
I had the same concern and as my first journal is going to be a bit of a test, I’m going with loose leaf paper and a 6-ring binder. I can keep only what is current and useful in the binder and archive older pages in a safe place. I might choose to do next year differently but I wanted flexibility while I’m learning and experimenting.
Hello! What are the black calligraphy pens you’re using for your day titles? Absolutely beautiful handwriting on those too! Wish I could do that!
Thanks so much, Sona! I’m using Tombow Fudenosuke brush pens, which do marvelously for small lettering 😀
In love with these ideas! Definitely going to try them out soon!
Awesome, thanks! I’m so glad you liked the post, Abby!
That’s awesome, Shelby! I loved to use washi tapes in my journal but I found many cool new ideas in your post like the DIY-envelope and the post-its. Makes me curious to read more articles. Thanks for sharing & greetings from Germany!
I’m thrilled that you enjoyed the post, Julia! Washi tape is just so wonderful, isn’t it? 😀 It’s just so darn versatile!
What would you suggest for my bullet journal? I am in the process of switching to my first bullet journal from my erin condren planner and I am struggling because I like to plan everything out in advance and my dailies just are supposed to be Day by day so I find myself carrying around both planners. I use my future log but o feel like it isn’t enough room and isn’t as organized and roomy as my other planner, what can I do?!
That’s a really good question, LaRen! There’s no hard and fast rule, but I would suggest that you simply experiment to figure out what works best for you. If the future log isn’t enough room, then expand it to two spreads instead of just one. If you want to have a more future minded daily set up, then consider using weeklies like I do here. And if something isn’t quite right or feels like it could use some improvements, give small tweaks over time and adapt your system day by day. I hope that helps!
Also, you can use multiple planners if that works best for you. I use a Circa SmartPlanner and recently added a small bullet journal also – I use the Circa for dates/schedules but the bujo for notes and lists and inspirational things and my habit tracker, etc. I also use the calendar on my phone to remind me of appointments on the day, so if I go out I can just take my phone and my bujo and leave the circa behind. Part of my evening routine is just putting any appointments I made while out into my circa.
I struggle to keep up with several planning systems, which is why I have it whittled down to one. But some people can comfortably balance several, like you 🙂 if it works for you, then more power to you!
Yeah, it wouldn’t work for me if I was duplicating too much information, but apart from appointments going into my phone first sometimes, the Circa and the bound journal don’t have the same stuff so it works out for me. (I wouldn’t use my phone except I like the fact it can tell me when I need to leave for appointments based on traffic. So that is a handy feature.) I found when I tried to use the Circa for everything that the planner got too thick if I had everything in it, and pages that got referred to a lot like lists of books to read got all worn out and chewed up. But I like the dated format for planning.
I know this isn’t mentioned here in these hacks, but unable to find a more applicable and appropriate post, I’ll share this comment here.
Years ago I was a rep for Stampin’Up and I have a TON of stamps and ink pads left over from that “phase” of my life.
My severe chronic pain main have ended my full-time stamping days, but I do still love it, even though I haven’t dug my stamps out in eons.
I’m excited to dig a few out and combine them with my love for BUJOing!!
Thanks so much for such a great, inspirational idea!!
Thanks so much, Connie! My grandma was actually a Stampin’Up rep and she was wild about scrapbooking. I actually was thinking how awesome it would be to put all those stamp to use in a planner. How gorgeous would that be?? I hope you dig out your stamps and go to town, and I’d love to see the result!
Great post! So helpful. ????????????
Love all of your posts, Shelby! And, I am loving the supplies you’ve suggested! Those pretty gold water colors! WOW! And, as you said, the water brush is SO much easier to write with than a paint brush! I ordered the 3 pack Zebra Mildliners, Dr. Martins, White liquid something or other… and also those (hydros?) liquid water colors you told us about! I am just so excited! I can’t wait until everything arrives!
Keep up the good work! I for one, really appreciate all of your hard work!
Susie