
How to Use a Wax Seal – A Simple Step-by-Step Guide
Articles may contain affiliate links.


Want to learn how to create super fancy and old-fashioned wax seals? It’s easy! Here’s everything you need to learn how to use a wax seal.
Touch of the Past
There is nothing quite as mysterious, dramatic, and impressive as a wax sealed envelope. It beckons you to open it and satiate your curiosity. Who knows what it could contain? The inheritance from a long-lost relative in an old mansion? An acceptance letter to a magical school? Perhaps it contains a secret that only you may know.
Whether the inside contains a party invite, wedding stationery, or a letter from an old friend, a wax seal provides a bit of magic to an otherwise ordinary piece of paper. You can master this old-fashioned style with just a few supplies and no skill at all! Allow me to show you how to use a wax seal in this easy step-by-step guide.
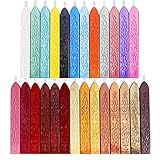
Sealing Wax
First, you’ll need some sealing wax! Wax typically comes in three different options. Let me break them down for you so you know what to get.
Sealing Wax Sticks with Wicks
These are like tiny candlesticks, basically. They are columns of sealing wax with a wick in the middle. You light the wick, which melts the wax so you can use. Sticks are good for when you are using a single color.
- PACKAGE INCLUDE: Anezus sealing wax kit comes with 26pcs different colors sealing wax sticks with wicks, provide a great solution for wax stamp sealing
- SEALING WAX STICKS WITH WICKS: These sealing wax are in good looking antique fire manuscript appearance and in different colors with retro luster. The wick design brings great convenience to seal and...
- EASY TO USE: The wax sticks are strong adhesion and hardness that make them easy to form sealing surface with glass objects. These wax seals melt easily and dry quick that are super easy to print, and...
- COMMON SIZES & MULTICOLORS: These wax seals are in size 3 5/8 x 1/2 x 1/2”. They are in 26 different colors that provide you a good selection of colors to match your needs
Sealing Wax Beads
You can also opt for the wax bead route. These small beads of wax melt in a spoon for you to pour onto your envelope. This is a great overall option but is especially useful if you want to melt multiple colors together into the same seal.

- Package included: 624pcs octagon sealing wax beads in 24-grid Plastic Box, 2 pieces tea lights candles and a wax melting spoon. It is a complete wax sealing set and meets your needs.
- Wax seal spoon: the length is about 12cm/ 4.8 inches, made of stainless steel and Rosewood, sturdy and durable, its wooden handle can let you hold properly to avoid hurt your hand by high temperature;...
- Optional colors: This wax sealing set includes 24 colors, it nearly can match all your usage for different purpose like different kind of color of envelops, invitation, or make the combination colors...
- Easy to use: This Sealing Wax sets includes all parts except the wax stamp. Its Wax seal bead is shaped in Octagon, put 2 or 3 beads will be enough to seal the Envelops, wedding invitations, etc. This...
Sealing Wax Sticks without Wicks
Much like the aforementioned wax sticks with wicks, these are simply wickless wax sticks. That is because you can use them with a glue gun to melt a lot of wax quickly. Sticks like this are ideal for professional calligraphers that do a lot of wax seals for events like weddings. That’s not to say that you can’t use them if you aren’t a professional! This is an excellent option for anyone creating a lot of seals. But if you’re just starting, I wouldn’t recommend using glue gun wax yet.

- Unique Color - Antique Gold, bring a elegant and calm touch to your invitations! Perfect for modern and boho wedding or an art project.
- Premium Quality - All sticks are made from a flexible wax, they will not break or crumble in the post. Ideal for decorating envelopes, post cards, invitations, thank you cards, snail mails, wine...
- Easy To Apply - Easily use together with a low-temp large standard 0.44" glue gun. Not designed for mini glue guns! If you plan to seal dozens of envelops, this is the most efficient method. To avoid...
- Package Includes - Pack of 8 sticks. Each stick can approx. make 12-15 seals. One pack to make 100- 120 seals. Size: 0.43” diameter x 5.5” length.
Gather Your Other Wax Seal Materials
Besides the wax itself, you’ll need a handful of other supplies before you can jump into the fun.


- ★High-quality and Durable Seal Material: It is made of sturdy mahogany handle and high-quality brass head, which is natural, non-toxic and non-polluting. The pattern is clear, smooth and shiny, not...
- ★Unique Retro Design:Antique letter initial design, suitable for decorating envelopes, can be used as holiday or birthday gifts and personal collections, etc.
- ★Wide Range of Applications: Ideal for Christmas cards, birthday cards, postcards, wedding or party invitations, hobbies or handicrafts, scrapbooks, evening parties and other special events.
- ★An Ancient Mystery Book Style Package Includes: 1* sealed copper seal, 3* sealed wax stick (silver/gold/dark red), 1* melting spoon and 2* tea wax. (Envelopes are not included)
Stamp Head
In order to create wax seals, you need a stamp. You can order a myriad of different stamp styles, like a Game of Thrones sigil, the Hogwarts coat of arms, your initial, round seals, square seals, or other various designs. You can even get a custom stamp head made for a reasonable price! That’s how I ended up getting my Little Coffee Fox logo as a wax seal. There are tons of options to choose from. Grab one or collect a few for different occasions!
Stamp Head Handle
Of course, you’re going to need a handle for your wax seal. You can usually purchase the head and handle in one package. If you’re wanting to get a few heads, you only need one handle. That makes storing your sealing wax kit much easier.
Wax Spoon
If you’re using wax beads (or cutting chunks out of your wax sticks), you’ll want a melting spoon. Make sure to grab one with something covering the handle like wood or plastic. A naked metal handle can get quite warm while you’re working.
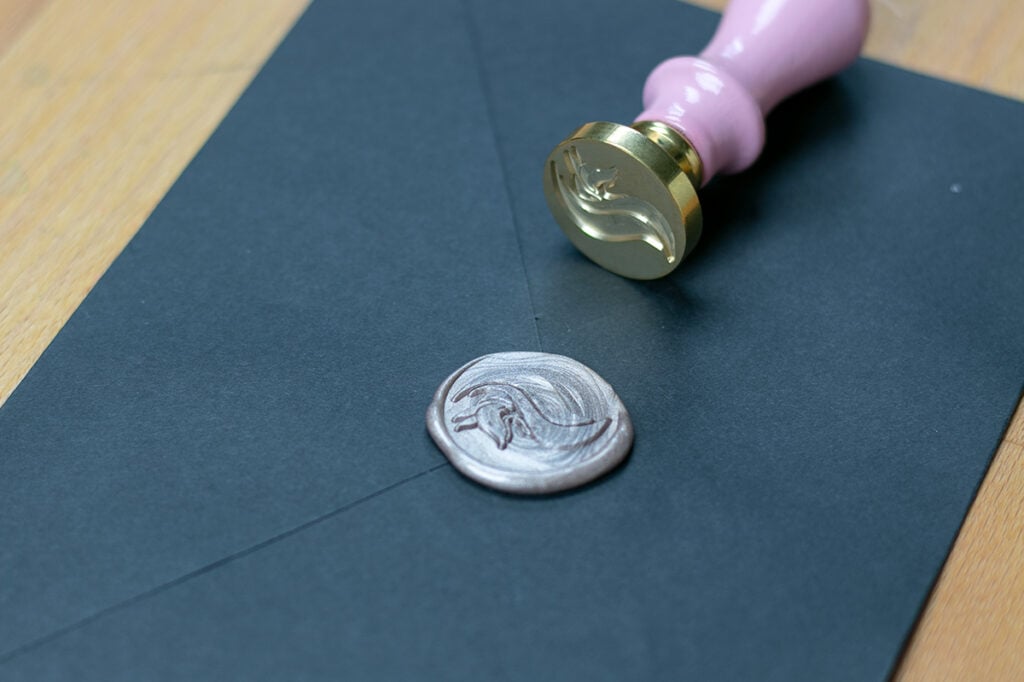
Envelopes
While you are more than welcome to press wax seals into anything and everything you desire, envelopes are the go-to choice. You can use whatever envelopes you want, but I personally like ones with pointy flaps like the black envelopes I’m using here.
Tealight
If you are using wax beads and a spoon, you need something to heat your wax. A tealight (or any candle, really) is an excellent and cheap option.
Glue Gun
While I wouldn’t recommend getting started with a glue gun, who am I to hold you back? If you go with this option, make sure to either use a glue gun you’re not attached to or buy a gun just for sealing wax. The wax is messy and will leave a residue in your gun.
Lighter or Matches
You gotta light your flame somehow, so grab a lighter and keep it nearby.
How to Use a Wax Seal with Wax Sticks
Now that we’ve gone over all the materials you need, let’s dive right into the process of sealing with wicked wax sticks!

Step 1: Prep
Once you light the wick on your wax stick, things will move quickly. So make sure you’re ready! Get your envelope in front of you, attach your seal head to the handle, pick your wax colors, and grab your lighter.
Step 2: Light
Hold the wax stick in your dominant hand and light the wick. It will begin melting quickly. Try to keep as much accumulated melted wax on the stick as long as possible before you let it drip.
Step 3: Drip
Hold the end of the stick over the spot you want your seal to be. Allow the wax to drip onto that spot until you get a wax puddle that is about the size of a nickel (a little smaller than an inch). Blow out the flame on the wax stick, allow the last bit of wax drip to fall onto the paper. Set aside.

Step 4: Stamp
Get your wax seal and check that the stamp face is oriented correctly, with the top of the design lined up with the top of the envelope. Push the seal into the pool of wax. Stir the wax slightly with the unheated end of your stick to help with air bubbles. Try to make sure there is excess wax all around the outside of the size of your seal.

Step 5: Rest and Remove
Allow the wax to cool for at least 30-60 seconds. Then gently pull your stamp away, revealing the design left behind.

How to Use a Wax Seal with Wax Beads and a Spoon
Now that you’ve seen how sealing wax works with the wax sticks, let me show you this fun alternative.

Step 1: Prep
Just like before, you want to gather your materials.
Step 2: Light
Light your tealight or candle on a safe surface.
Step 3: Melt
Add three or four wax beads into your spoon and hold about an inch above the flame. Don’t put the spoon directly in the candle flame because you will get a black sooty residue on the underside of the spoon, which might end up in the wax. Hold the spoon over the flame for a minute or two until the beads have all melted.

Step 4: Pour
Pour the contents of your spoon over the lip of the envelope, getting as much onto the paper as possible. Set spoon aside (but mind that it’s still hot).

Step 5: Stamp
Check that your stamp is oriented correctly. Then push the stamp into the pool of wax, taking care to get wax excess all around the stamp to ensure uniform thickness.

Step 6: Rest and Remove
Allow the stamped wax to cool for a minute or so, then gently pull the stamp away to reveal your wax seal.
Don’t Forget to Clean Up
If you want your materials to last, then you need to make sure to properly clean all of your tools. Cleaning a traditional melting spoon can be a bit tricky, so make sure to check out how to clean a wax seal spoon.
How to Send Your Wax Sealed Envelopes in the Mail
Now that you have the know-how to create beautiful wax seals on your stationery, you need to know how to successfully deliver your envelopes in one piece. It’s always a good idea to check with your local post rules and regulations to see if they have any guidance on the matter, as the rules might change from region to region. I can share some of my experiences sending wax seals here in the USA.
Can you Send Your Wax Seals Through the Mail?
As far as I know, where I live, your letter won’t be rejected because it has a wax seal. And many waxes you can purchase for wax seals are pliable and durable enough that they can bend and flex while being transported without breaking or crumbling.
However, even if you can just stick your envelope in the mailbox, that isn’t necessarily the best method. Mail sorting machines are built for flat pieces of mail, and the extra bulk of a wax seal could cause complications. The machine could jam, or more likely, the machine will damage or potentially destroy your beautiful envelope.
I have sent my wax sealed envelopes through the mail only to hear from the recipients that the seal was squished, scuffed, or otherwise ruined. That’s a frustrating thing to discover after all that hard work!
Hand Canceling Your Mail
The first thing you can do to prevent messed up mail is to pay a little extra for hand sorting or hand canceling the envelope. This basically means that the postal workers will not run your pretty envelopes through the machine, and will instead handle them with a bit more care. Always call ahead to your post office to ask if they offer this service and how much it will cost.
However, this isn’t a surefire way to keep your envelopes from getting chewed up in the machines. When I sent out wax sealed invitations for a Halloween party a few years ago, I paid extra for hand canceling and I found out that several invitations were clearly run through the mail sorters. One friend didn’t get her invitation until two months after the party!
Protect Your Package
The best way to protect your letters and invitations is to simply deliver them by hand when possible. For example, when I had my Halloween party, I was inviting friends who I saw on a regular basis. So a few weeks before the party, I brought a bunch of their invitations to a gathering and handed them out to many “oohs” and “ahhs”.
If you must send your letters and invitations through the mail, I would recommend you insert the letter with the wax seal into a slightly larger envelope. This will be the very best way to protect the stationery you worked so hard on creating because the outer envelope will take the brunt of any travel damage.
As a way to split the difference, you can mix your methods! When I hosted a baby shower a while back, I sent out invitations in the mail sans wax seal to the people who lived far away. For the local friends and family, I added a fancy wax seal to their invitations and hand-delivered as many as I could. That allowed me some pizzazz with the invitation without worrying about envelopes getting lost or chewed up in the mail.
Wax Seals Ain’t So Hard
This old-fashioned method of sealing envelopes might look extra fancy, but it’s not hard at all to pick up. With only a few materials, you can begin sending special letters in no time. Wax seals are perfect for wedding invitations, certificates, baby showers, Halloween parties, or plain ol’ letters. You will delight your recipients when they pull your envelope out of their mailbox. Give this wax seal tutorial a try and see just how fun it can be!


Thank you for this awesome post! I do have a question- how do you melt more than one color into your seal? I’ve seen many beautiful wax seals that have two or three colors and I’d love to try to get the same effect!
It’s easy! You need the wax pellets to create this look. All you need to do is add different colored pellets (no more than about five pellets for a single seal) to your spoon, let them melt, and pour! If you want them more mixed together, you can use a toothpick to give them a swirl before pouring them. Then stamp it like normal and boom, mixed colors in your wax seal.
Just wondering, I know that that the flexible wax says it’s good for mailing, but won’t the postal service refuse to process anything with wax seals?
Where I am (Illinois, USA), they won’t refuse to process your envelope if it has a wax seal. They will, however, throw it in with the other envelopes where it will get run through sorting machines. These machines might not harm the wax seal, but they have the potential to damage or even rip off the wax seal, which is obviously not ideal.
You can pay a little extra to have them hand-sorted, but this isn’t necessarily a guarantee. Once I paid for hand sorting and my party invitations got machine sorted anyway, resulting in several invitations never reaching their destination, looking super scuffed up, or arriving two months late. To say I was frustrated was an understatement!
The very best way to ensure your wax seals will arrive in good condition would be to hand-deliver them if that’s an option. That’s what I did for some of the party invitations since I knew I would see a big group of my friends a few weeks before the event. Alternatively, you can protect your pretty wax seals and stationery by slipping them into the next size up envelope and paying for hand sorting. It’s definitely a bit extra, but if you’re going to the trouble of making gorgeous wax seals, you have to take a few extra steps to protect them!
I think I need to add this information to this post because I learned much of it after the post was published. But it’s important to know how to send your wax sealed envelopes once you’ve put all that time and energy into them!
If I may add a helpful tip?
If you find your seal sticking to the wax when lifting after the wax is cooled or if little bits of wax are stuck in your seal, this may be an indication that you need to *wet* your seal before stamping it into the wax.
A wet folded paper towel or wet sponge should do the trick. Just dab your seal onto the wet paper towel or sponge to get the metal damp, then stamp as usual. Or if you want a really interesting look, dab the seal into an ink stamping pad (metallic colors really pop!) before pressing the seal into the wax for a two-toned effect.
I had a seal with ornate filigree that needed wetting before stamping and it got “clogged” with the wax. I figured out how to clean it out and avoid the problem.
To remove the wax stuck in your seal, gently heating the seal (much like your tutorial on cleaning the melting spoon) should help remove the unwanted wax. Just be careful not to singe your fingers or have soot build up in the seal.
A wood toothpick can help remove the wax from the stubborn nooks and crannies while the wax is still fluid. The toothpick is tiny enough to get into detailed areas and is soft enough not to damage the metal. Any scratch made to the metal will become a permanent feature of all seals made afterward.
I hope this helps! I am so glad to see wax seals are making a comeback in the jouranling and crafting community. I love their antique look and mood. I can’t get enough of them. ^_^
Ah, thank you so much for this incredible tip, Mary! I hope to see more people bringing this gorgeous craft back into the modern world!
Thank you for this wonderful, informative post Shelby. I like how you share photos for every single step, very useful, thank you! 🙂
Thanks so much, Mete! I’m thrilled that you enjoyed this post ?